This tutorial is designed for faculty who have previous experience using Kaltura in Brightspace. For further information, please contact ltsisupport@uvic.ca for assistance.
Scenario
This tutorial will cover the steps involved when you wish to download and set up to record video using Kaltura Capture through Brightspace.
Kaltura Capture is an application that allows you to record, save, and view your own presentations and lectures by capturing video, audio, and screens individually or in parallel. You can then publish your recordings to your My Media space in Brightspace and use the recordings in your course.
Steps
- Go to your course in Brightspace.
- Go to Kaltura My Media (through the link on your Navbar, or in your Course Tools drop-down menu).

- Click Add New and select Kaltura Capture.
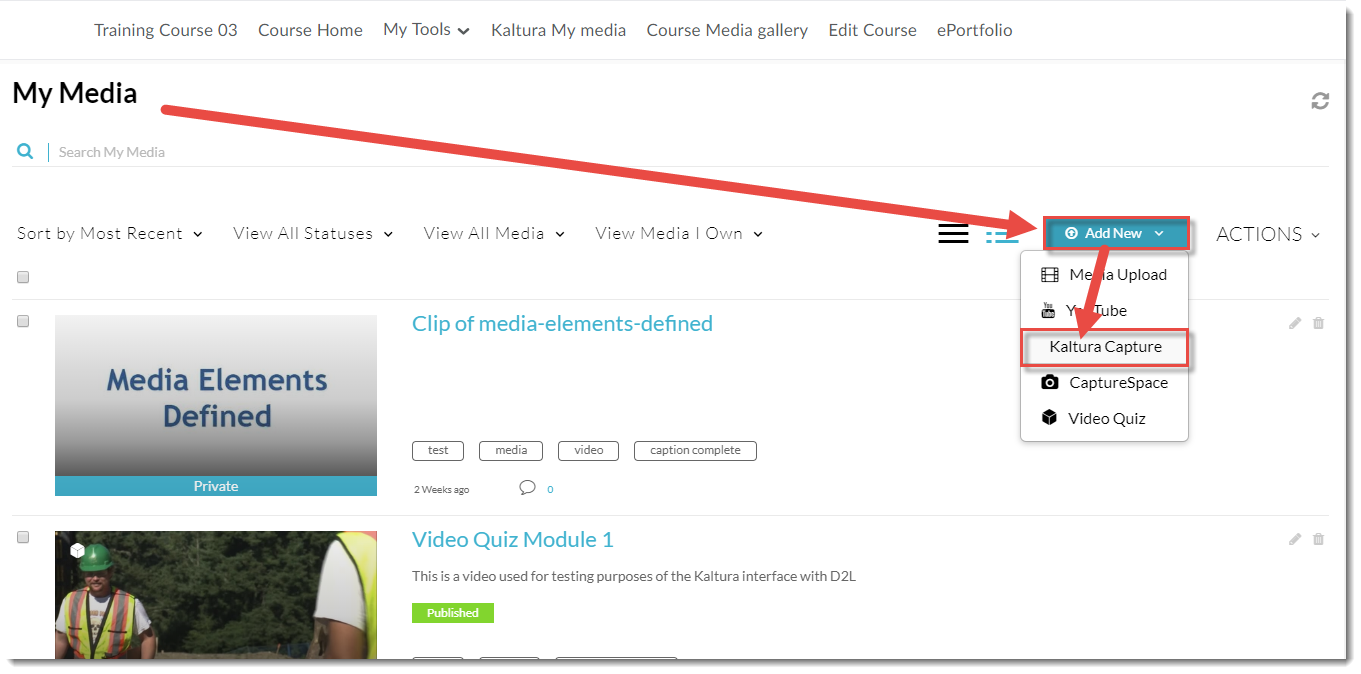
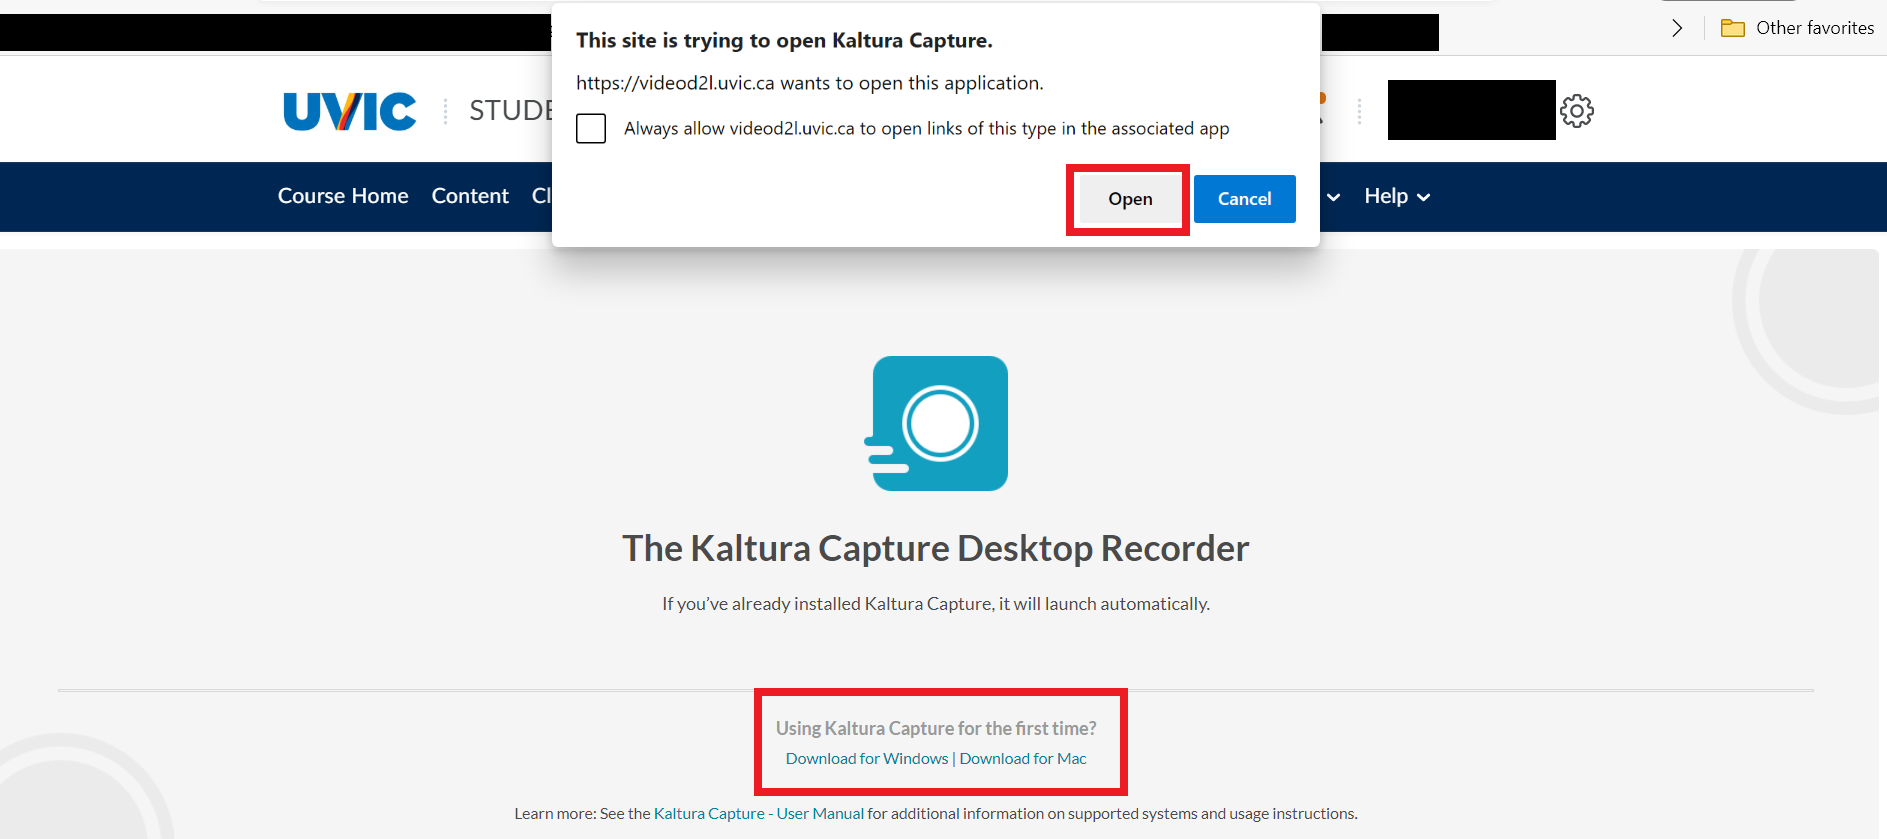
- If you have not downloaded Kaltura Capture to your computer yet, click the Download button appropriate to your device to download and install Kaltura Capture. Once it is downloaded and installed, you will be able to click Open Kaltura Capture.
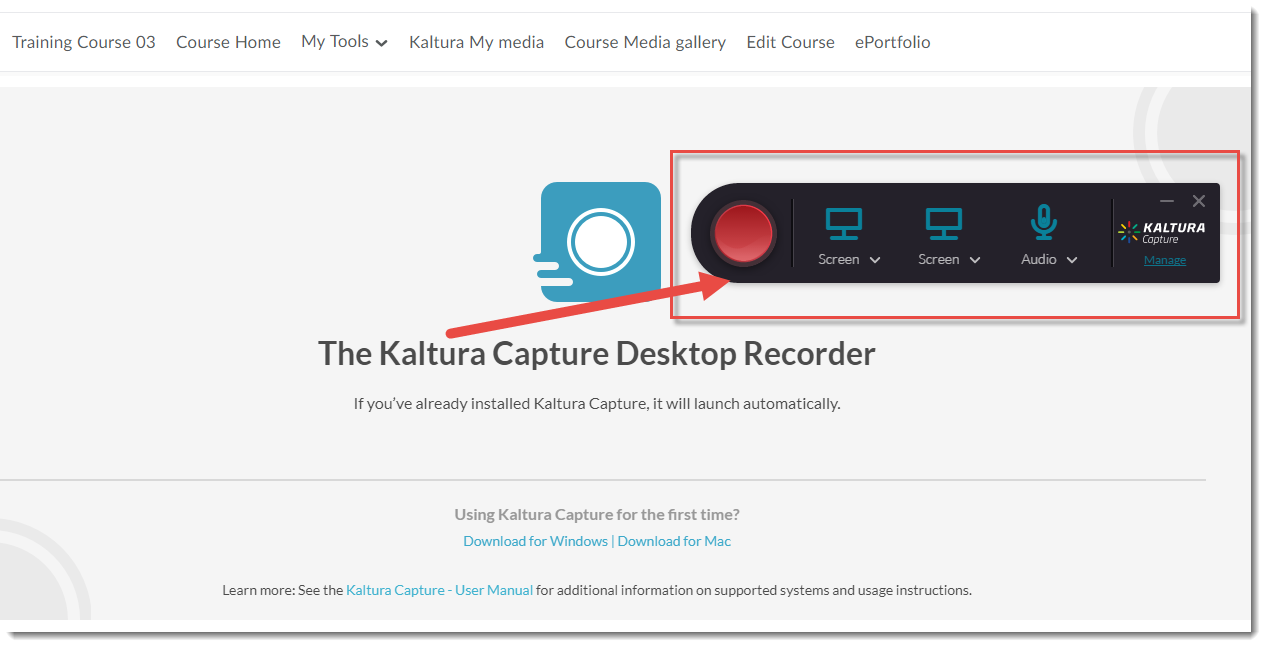
- When Kaltura Capture opens, you will see the Kaltura Capture recorder appear (it may take a few seconds for it to open). You can use your mouse to move the recorder around on your screen so it is out of the way while you record. We will take a quick look at what you will find in the recorder.
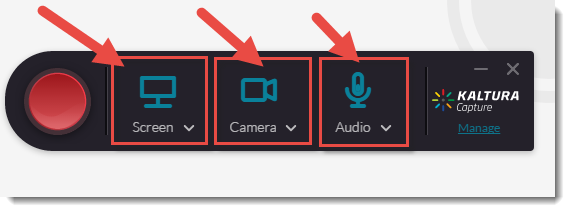
6. Screen allows you to record activity on your computer screen. Camera activates your computer camera to record your smiling face. Audio activates your computer microphone to record your voice. Each of these recording types will be covered in a separate tutorial.
7. The Manage link gives you access to your library of recordings, and the Media Capture Settings.

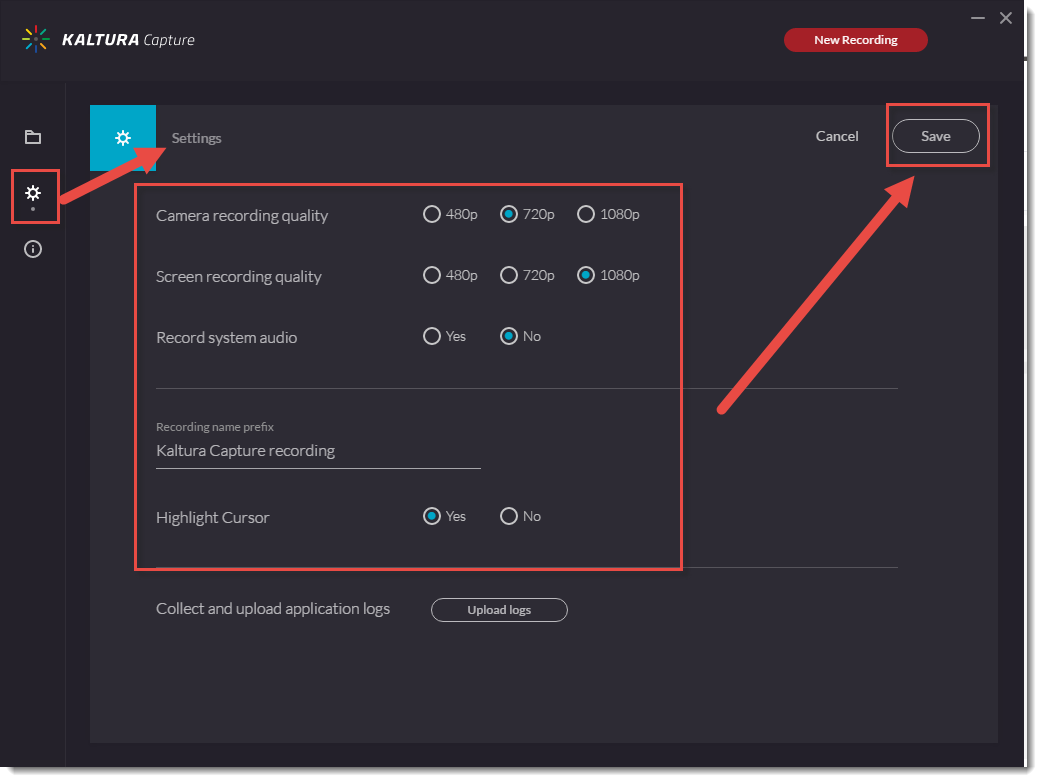
8. In Settings, you can set your Camera or Screen recording quality, decide to Record system audio or not, give your recording a Name, and choose to Highlight Cursor (if you are doing a screencast). Click Save when you have chosen your settings.
Things to Remember
Various recording scenarios will be covered in separate tutorial documents:
- Creating Audio Recordings in Kaltura Capture
- Creating Webcam Recordings in Kaltura Capture
- Creating Screencast Recordings in Kaltura Capture
- Creating PowerPoint with Voiceover Recordings in Kaltura Capture
This content is adapted from eLearning Tutorials by Camosun and licensed under CC BY 4.0
