This tutorial is designed for faculty who have previous experience using Brightspace and who have uploaded media to My Media in Brightspace. For further information, please contact ltsisupport@uvic.ca for assistance.
Scenario
This tutorial will cover the steps involved when you wish to add information and functions to your media files, including closed captioning, attachments, and collaboration permissions edit a video (or other media file, such as an image or an audio file) using the My Media interface in Brightspace.
Steps
- Go to your course in Brightspace.
- Go to Kaltura My Media (in your Course Tools drop-down menu).

- Click the Edit icon (the pencil) to the right of the media piece you wish to edit. For the purposes of this tutorial, we will work with a video.
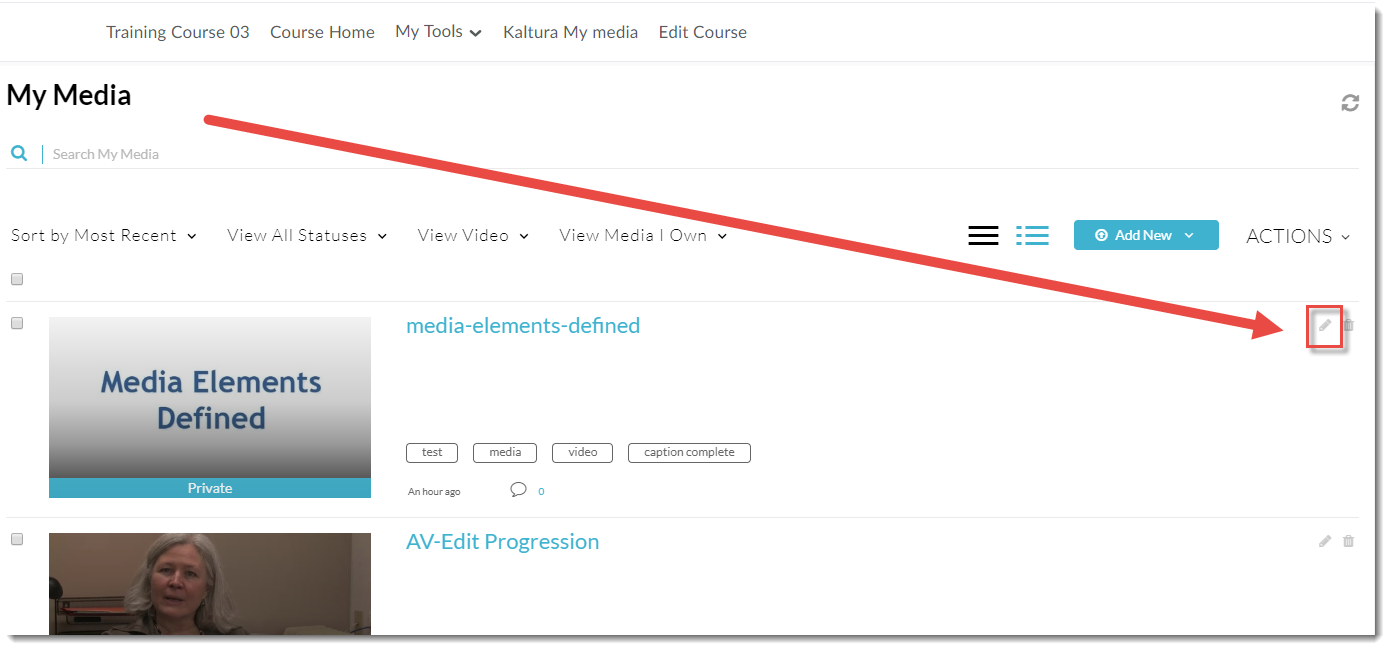
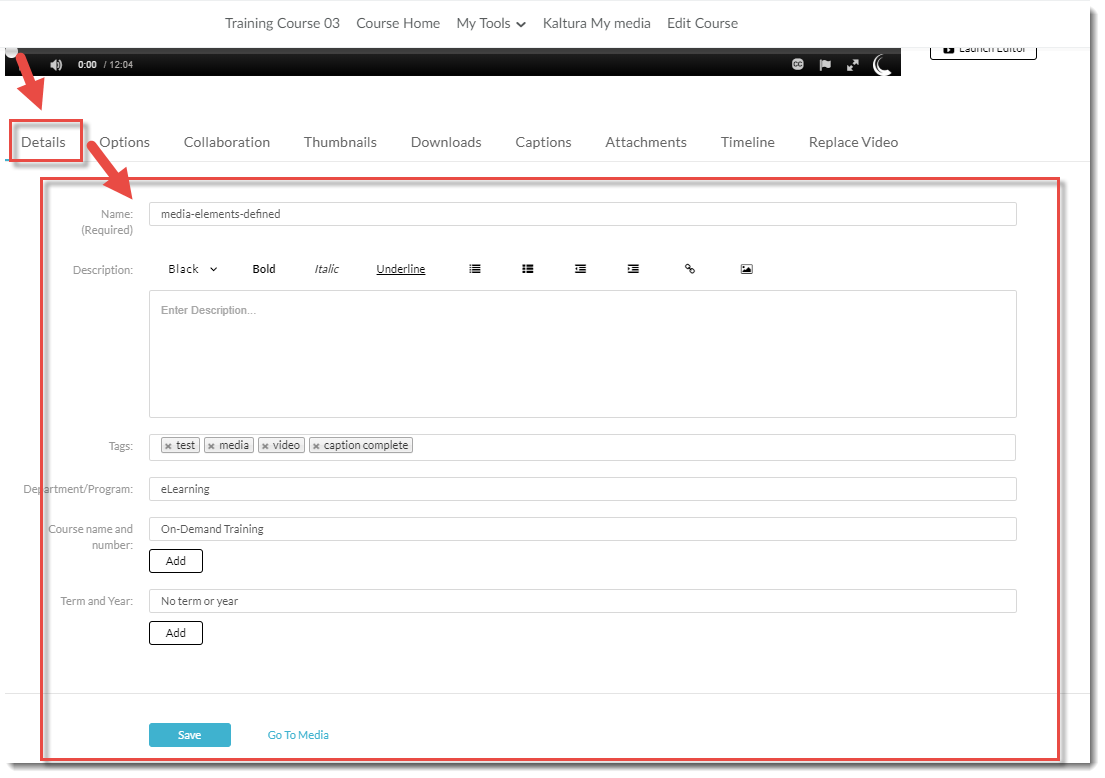
- You will see the video at the top of the page, and under it a series of tabs which allow you to add important elements to your video. We will go through each of these tabs in turn, starting with the Details tab which appears by default. From the Details tab, you can edit the information you added when you uploaded your video: Name, Description, Tags, etc.
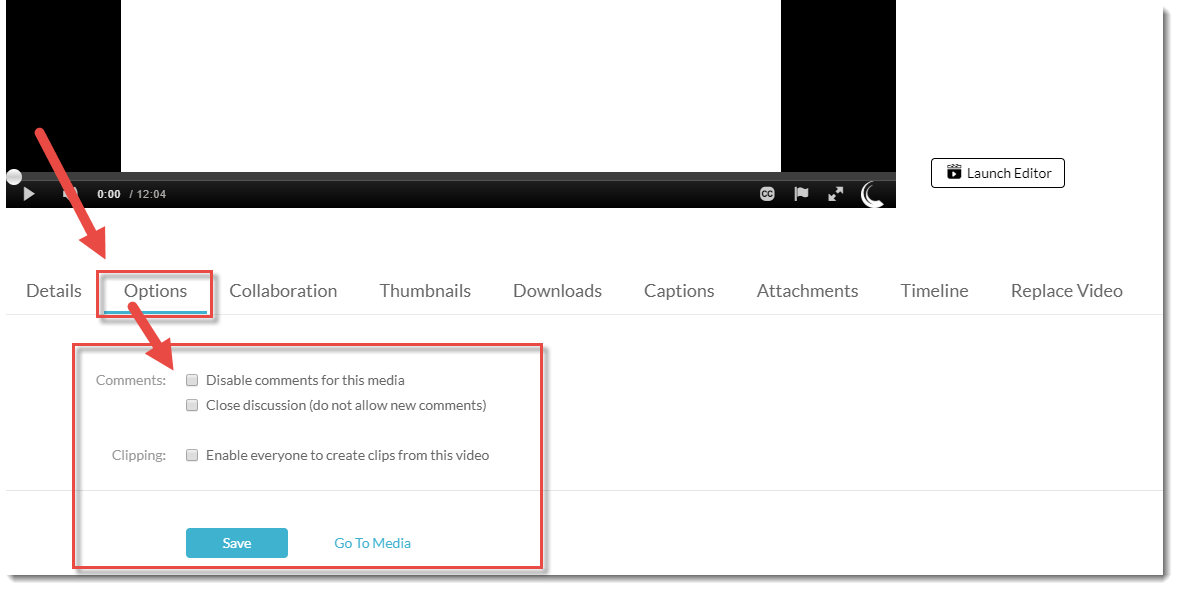
- From the Options tab you can disable commenting or close commenting (for example, if you have asked students to comment on a video for a specific period of time, but don’t want them to comment after and end date). Commenting is not a feature that will appear when you embed a video into the HTML editor in D2L. It will, however, appear if you add a video to the Course Media Gallery. If you do not wish students to comment on a video, disable this feature.You can also enable viewers to create clips. This means that students will be able to select Create Clip from the Actions drop-down menu when they are viewing the video in the Course Media Gallery. Students will only be able to save their clipped video as a copy, so it will have no impact on your original file.
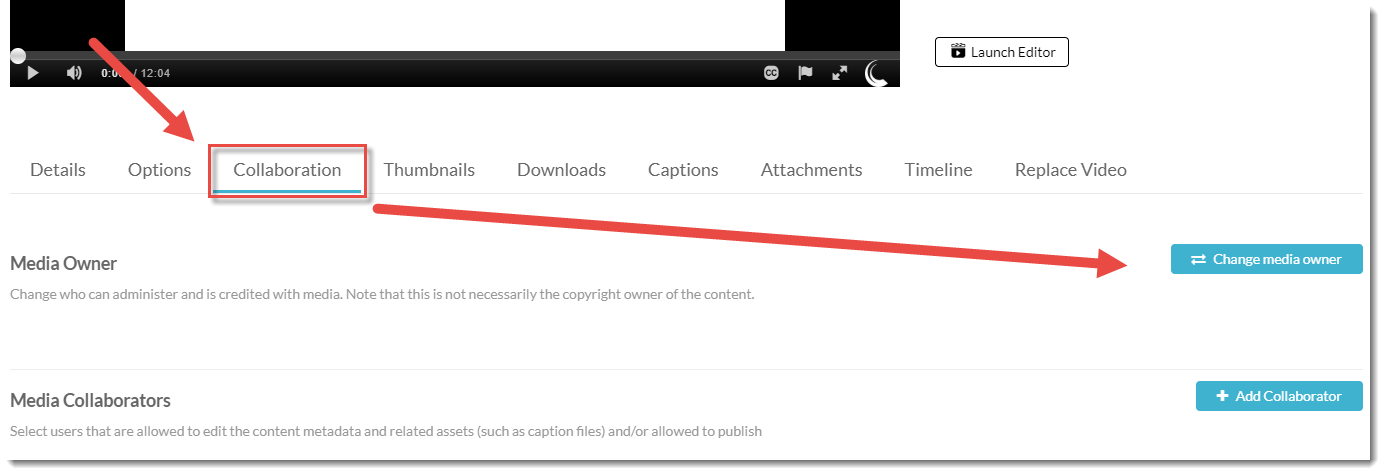
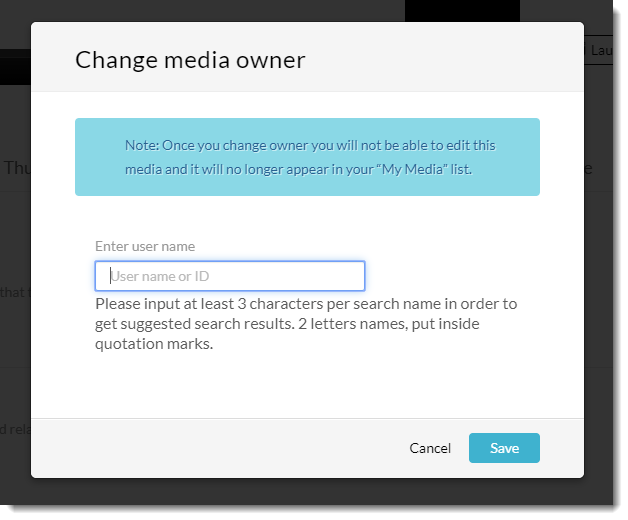
- From the Collaboration tab you can click Change media owner to transfer ownership of your video to another instructor (you will need their user name or C#). This will mean the video will no longer appear in your My Media video list.
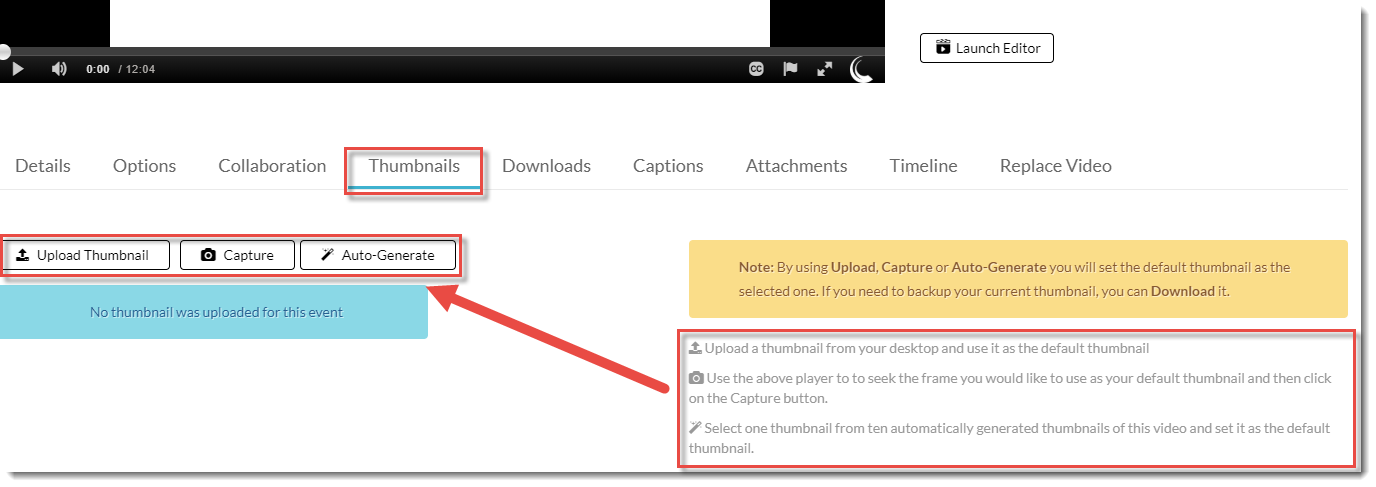
- From the Thumbnails tab you can change the initial image you see before playing the video. You can Upload a Thumbnail image, Capture an image or allow Kaltura to Auto-Generate a thumbnail image for your video.
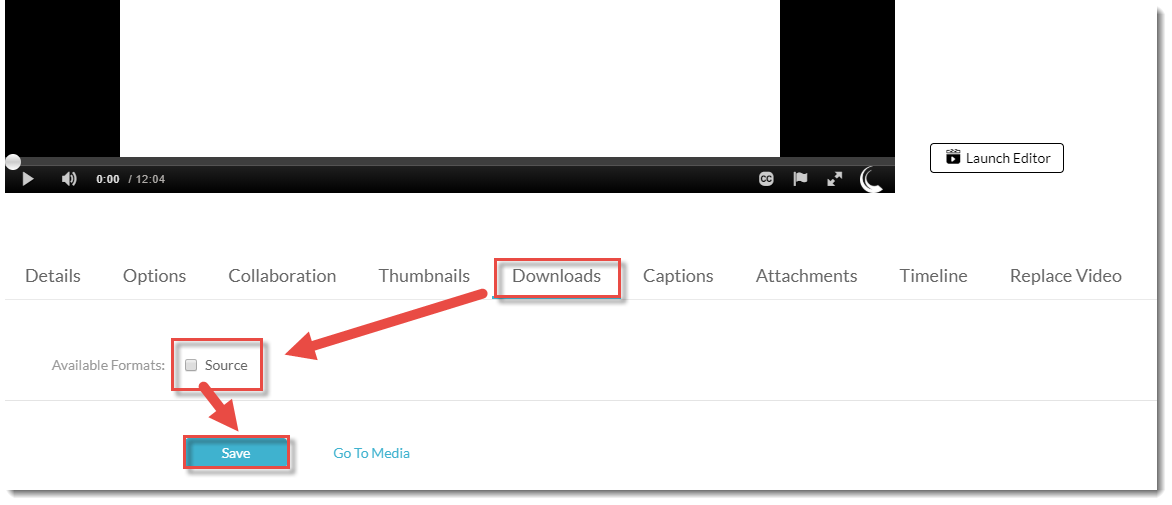
- From the Downloads tab you can select Source to allow students to download your video.
- From the Captions tab you can upload a captions file you have created (or arranged to have created) outside of Kaltura. Captions are also added to your video automatically by Kaltura (they take a bit of time from after you have uploaded a video to be added) and you can see (and edit) the basic information about that captions file in this tab.
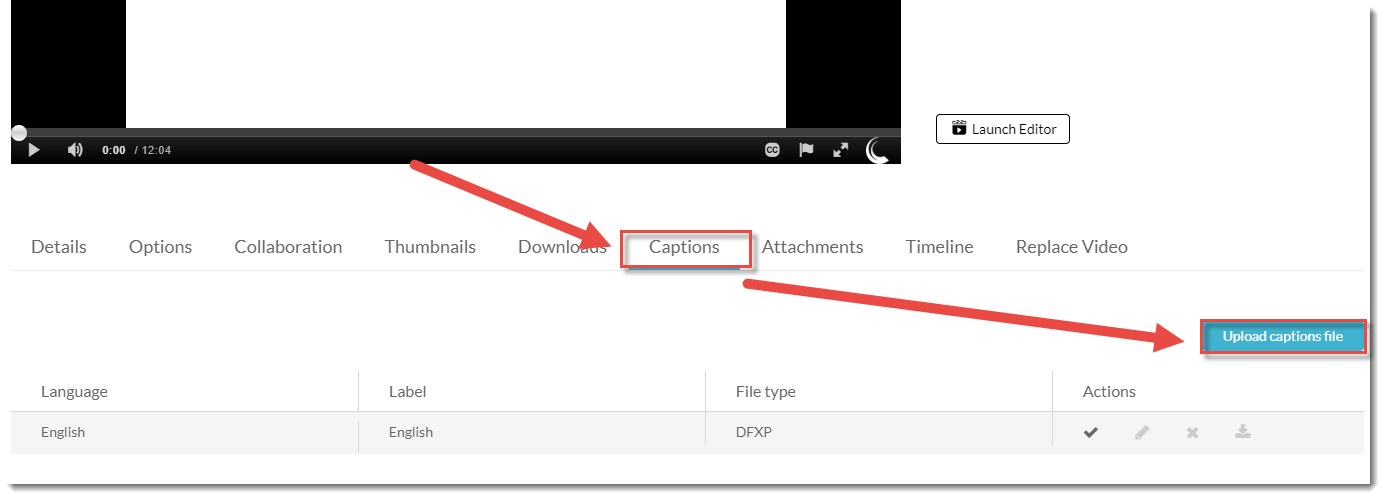 You can also edit auto captions themselves, which we highly recommend as their accuracy is not 100%, but NOT from this tab! For more information on editing auto captions, see the tutorial Editing your Video Captions.
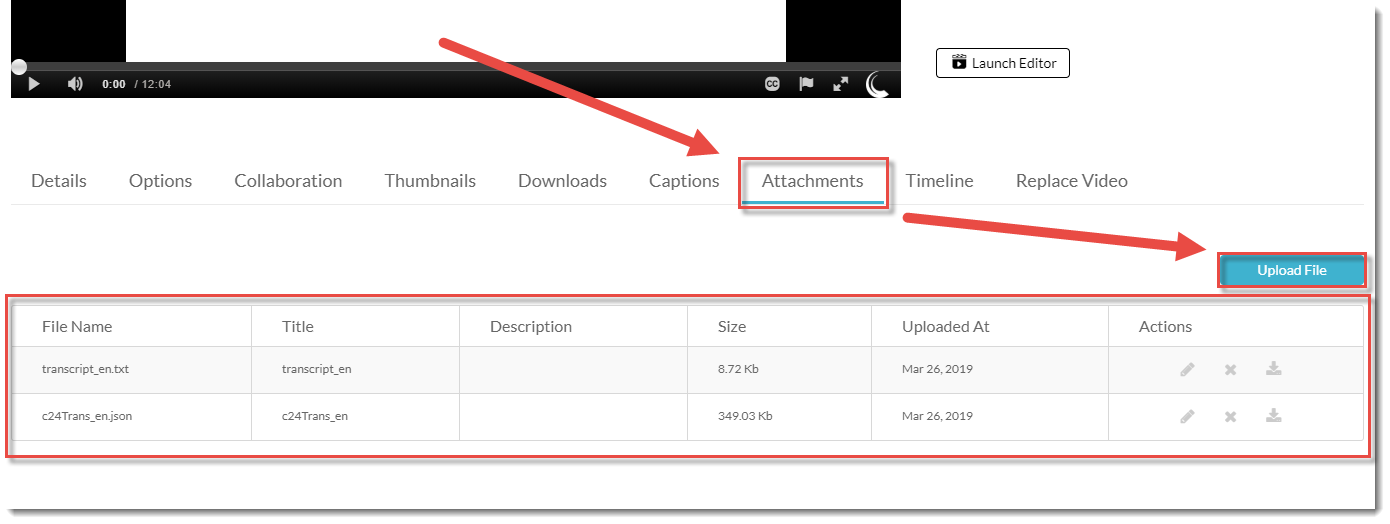
 - From the Attachments tab you can upload additional files you wish to have attached to the video, for example, a transcript, or a work-file for students to complete as they watch the video. Auto captions also create transcript files as attachments which can be seen listed in the Attachment tab view here.
- From the Timeline tab you can create Chapters for your video so that students can go to specific parts of a longer video, for example.
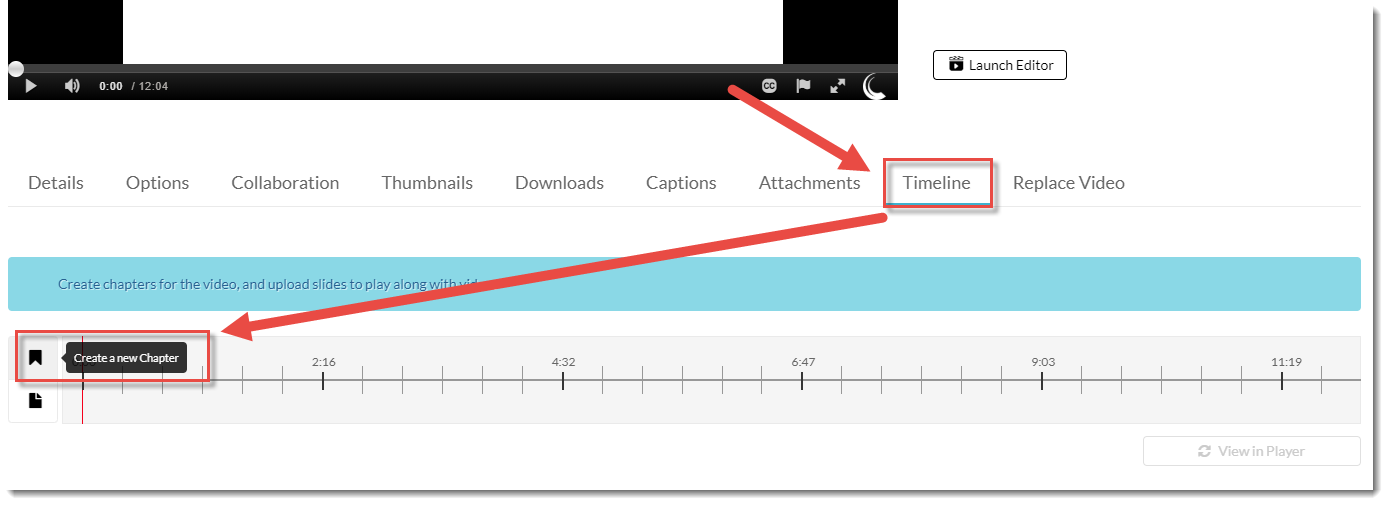 You can also upload slides to play with the video.

For more information on how to create chapters and upload slides, see the tutorial Creating Chapters for your Video.
- From the Replace Video tab you can replace the video currently in place with another video, perhaps an updated version of the video you uploaded previously.

Things to Remember
Audio files will have all the same tab options as video, except for the Replace option. Images only have Details, Options, Collaboration, and Attachments tab options.
This content is adapted from eLearning Tutorials by Camosun and licensed under CC BY 4.0
