This tutorial is designed for faculty who have previous experience using Brightspace, who have uploaded media to My Media in Brightspace, and embedded videos and/or playlists in Content. For further information, please contact ltsisupport@uvic.ca for assistance.
Scenarios
This tutorial will cover the steps involved when you wish to copy the Kaltura media you own (i.e., what is found under your My Media tab) from one course to another (for example, from your master course shell into your live course site).
You can either copy all components or copy select components of your master site to your live Brightspace course to achieve this. If you Copy All Components, everything will copy so there should be no issues, therefore we will go through the steps involved when you are just copying selected components, for example, Content pages containing embedded videos and/or playlists only.
Note that you cannot copy the Kaltura Media Gallery from one course to another because it is specific to an individual Brightspace course site. Therefore, you will need to build a Kaltura Media Gallery for each Brightspace course site from your My Media (which remains intact no matter which course you are working in).
Steps
- Go to the course in Brightspace you wish to copy To.
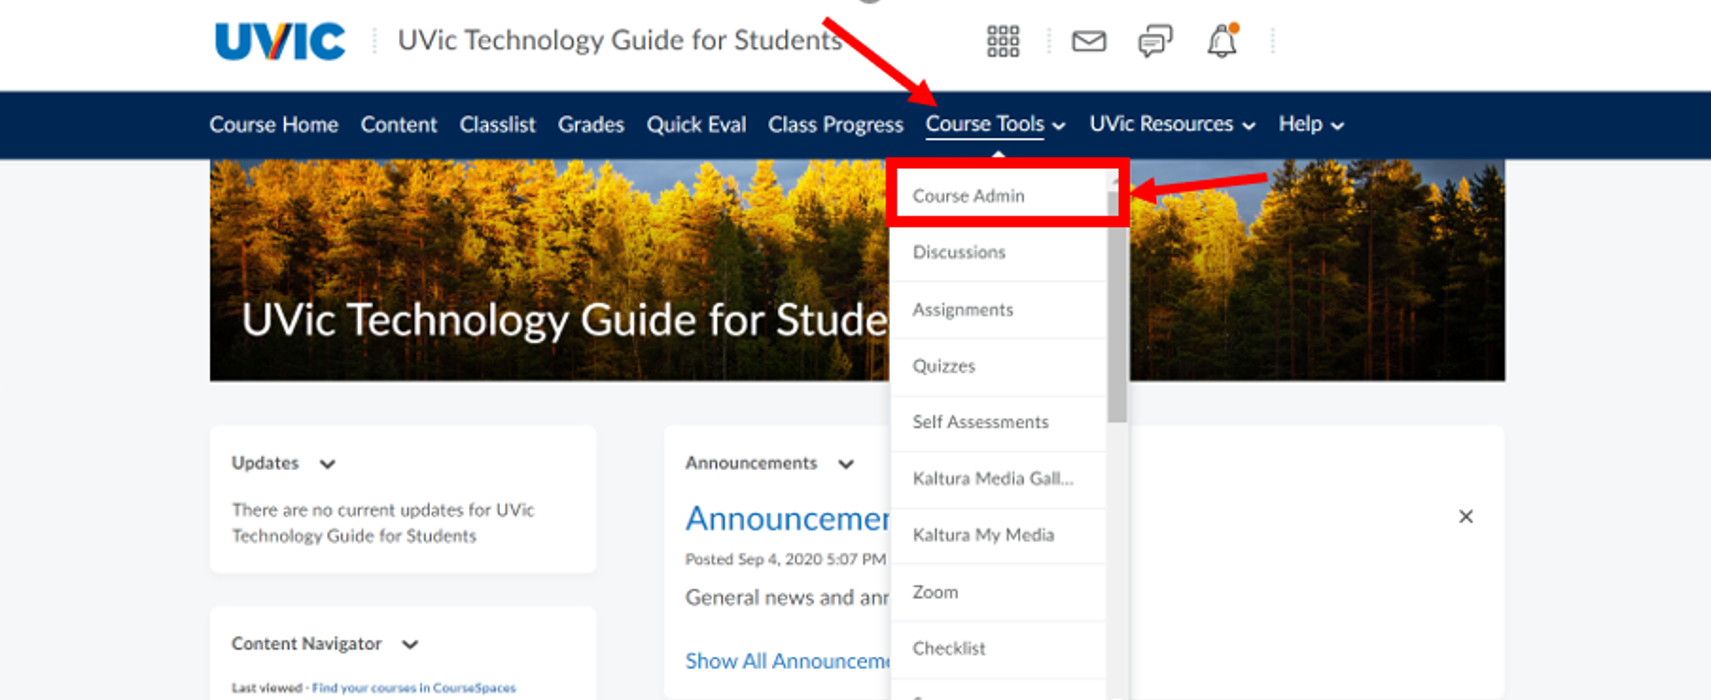
- Click Course Tools located in the navigation bar, then click Course Admin.
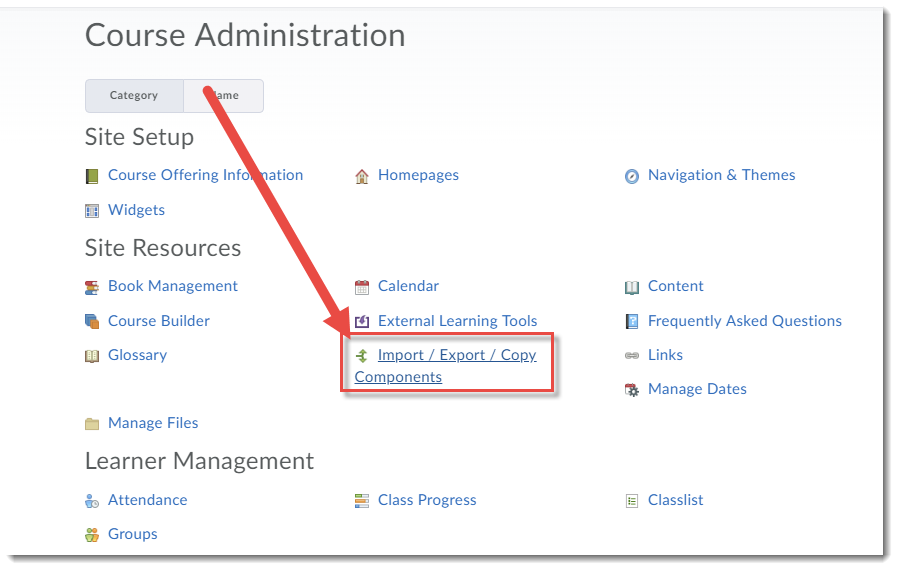
- Click Import/Export/Copy Components.
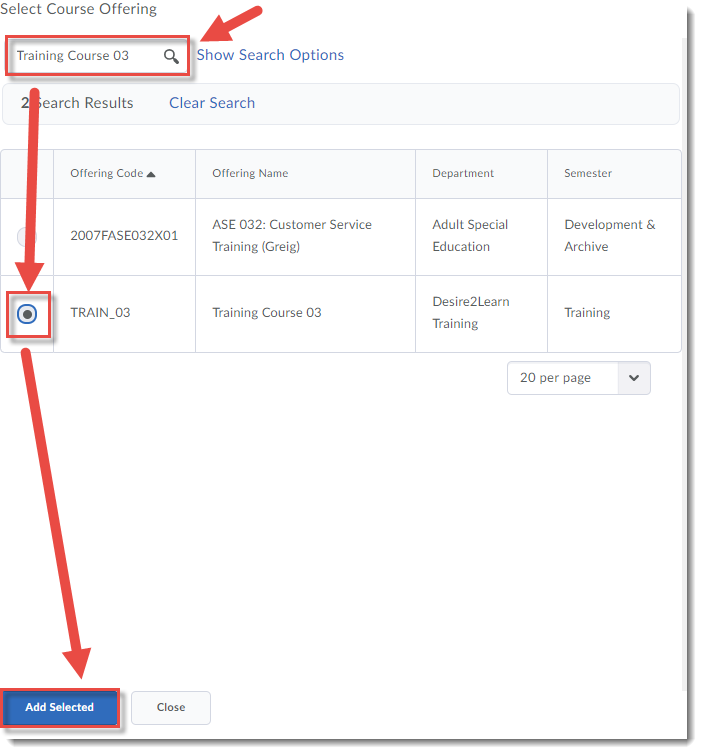
4. Click Search for Offering.

5. Find the course you want to copy FROM, select it, and click Add Selected.
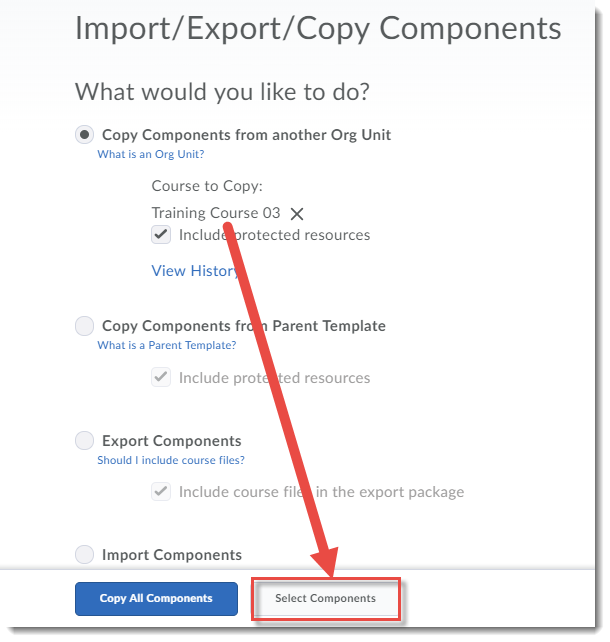
6. Click Select Components.
- Select Content (and Select individual items to copy if needed), AND select External Learning Tool Links. This second is very important as it is the link to the Kaltura video embeds in the Content you are copying. Click Continue.
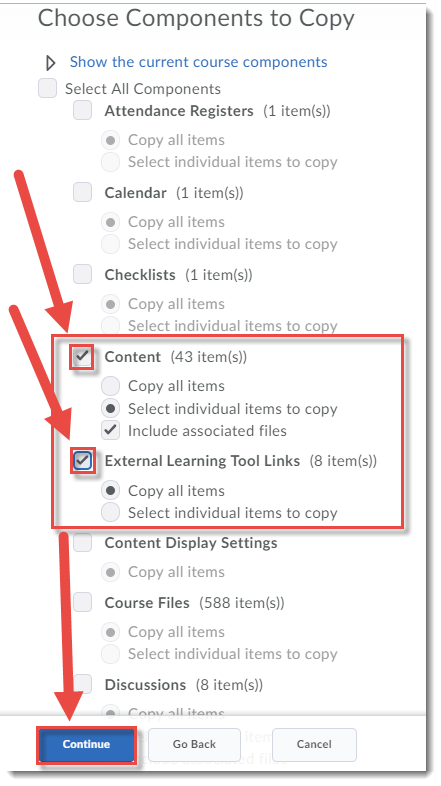
8. If you have opted to select individual items, select them on the next page, and click Continue. If not, go to Step 9.

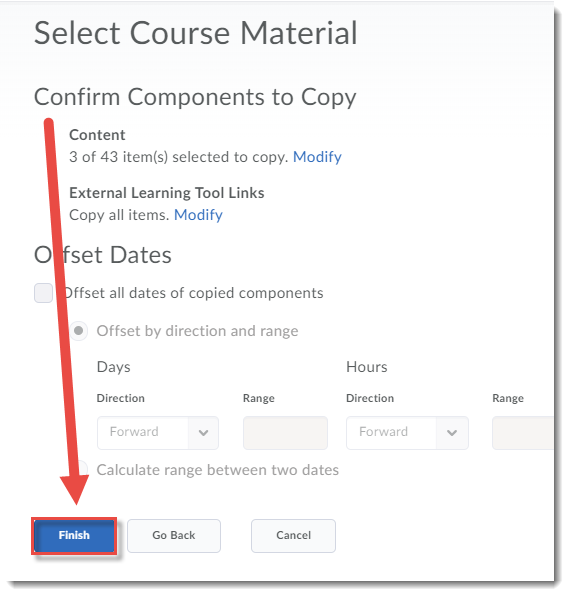
- Click Finish. Then wait for copying to be completed.
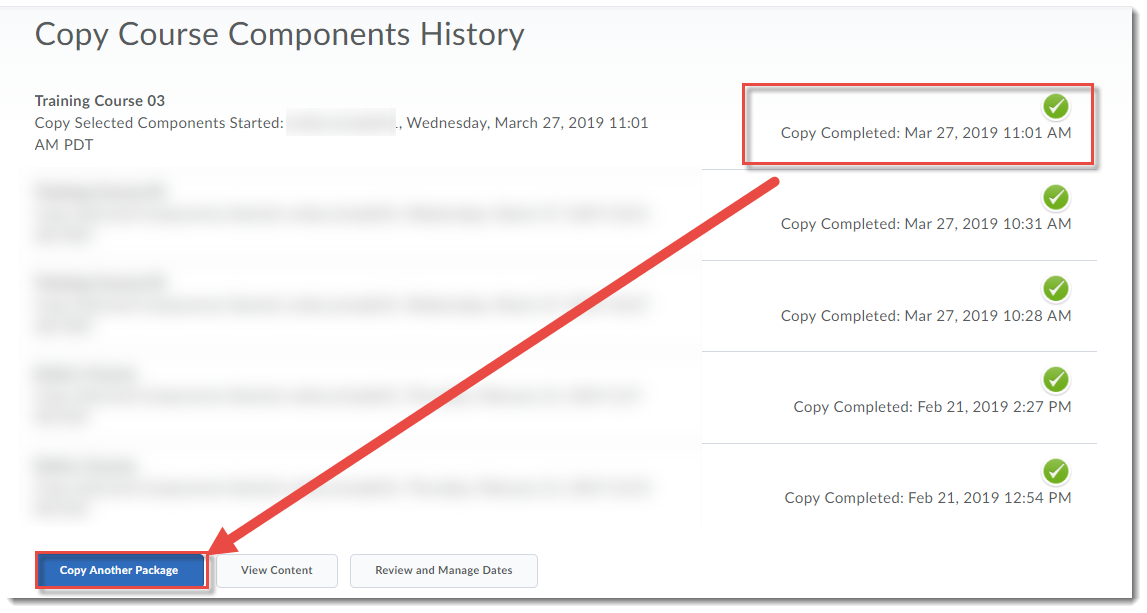
10. Click View Content if you are finished and would like to check that the content functions properly, or select Copy Another Package if you have more content you would like to transfer.
You can also check your personal Kaltura content at any time by navigating to Kaltura My Media under the Course Admin tab.
Things to Remember
For information on how to share your Kaltura media with other faculty members who don’t have access to your course, see the tutorial Sharing Kaltura Media with Others.
This content is adapted from eLearning Tutorials by Camosun and licensed under CC BY 4.0