The Content tool allows learners to easily navigate course materials and activities such as readings, video lectures, discussions, assignment submission folders, and quizzes. By adding these items to the content area of your course, you can keep it organized and easier to navigate, which can contribute to the experience learners will have when accessing your course in Brightspace.
Brightspace offers two different types of Content areas, which will vary depending on the content experience currently being used in your course page. This guide addresses the New Content Experience. For details on the Classic Content Experience, please visit this guide. Instructions for switching between content experiences for a course page can be found here. We recommend not making this change while a course is ongoing or while students have access to avoid confusion.
New Content Experience
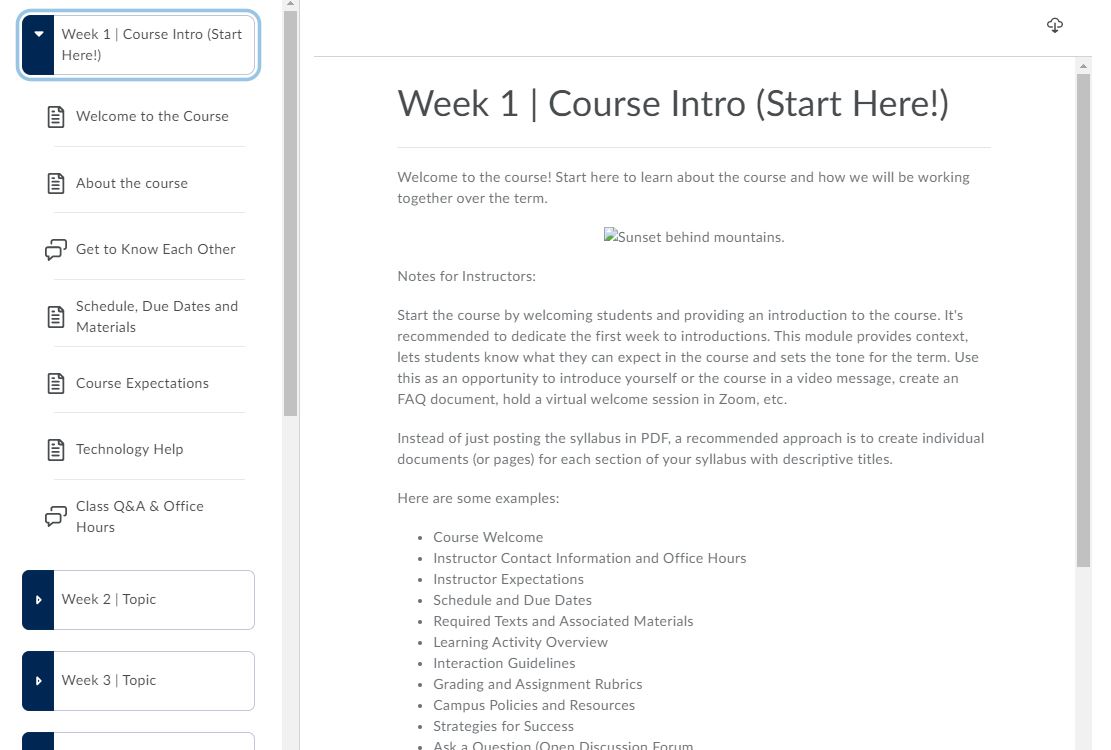
In the New Content Experience, learners can use the Content tool to access course materials and complete required activities contained within each course module. The Table of Contents panel on the left side lists all units available in a course. Inside each unit, learners will find links to each unit’s contents (ex. assignments, discussions, readings). Students can download a zip file of the unit onto their device by using the cloud icon on the top right corner.
How to access the Content area
The Content area can be accessed through the Course Home or Content tab on the blue navigation bar.


How to add new materials
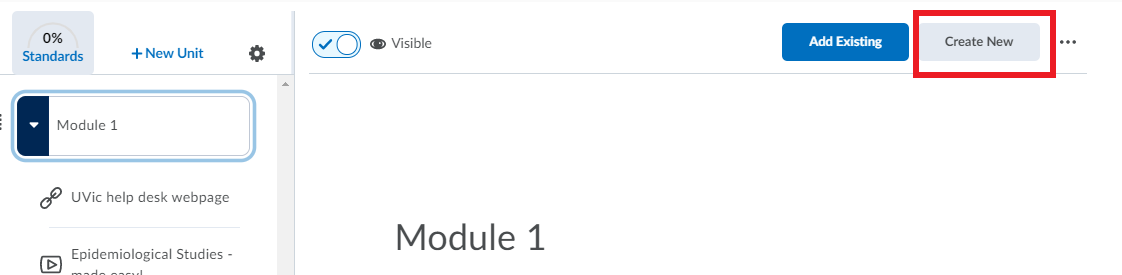
- Go to Content, and then go to the unit you want to add content to. Select Create New. Alternatively, click + New Unit to add a new unit.
2. Select the type of content you want to create by selecting the respective icon.
3. Click Save or Create and Insert when done.
How to add existing materials
- Go to Content, and then go to the module you want to add content to. Select Add Existing.
- Select the type of content you want to add by selecting the respective icon. You can also upload SCORM or xAPI files in the drop-box.
- Select the specific content you would like to add.
How to add units or lessons
- In Content, select + New Unit.
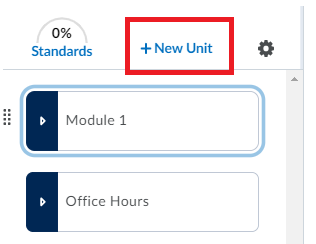
2. Enter the unit name in the New Unit text box, then enter a description if needed.

3. Click Save
Note: the new unit will be hidden by default so remember to make the unit visible when it is ready to be shown to students.

How to reorganize units
- In Content, hover over the unit you want to move. An icon with 8 dots will appear to show that the unit is ready to be moved around.
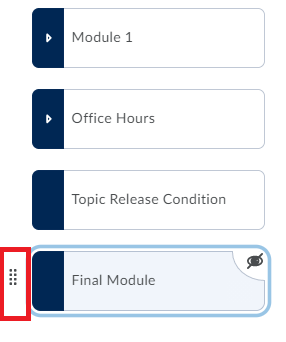
2. Drag the unit up or down according to your needs.
