This tutorial is designed for faculty who have previous experience using Brightspace and who have uploaded media to My Media in Brightspace. For further information, please contact ltsisupport@uvic.ca for assistance.
Scenario
This tutorial will cover the steps involved when you wish to create chapters for your videos and add slides to those chapters. Chapters are especially useful for a longer video, and can be used, for example, to mark different topics covered within the video so students can easily go to them.
Steps
- Go to your course in Brightspace.
- Go to Kaltura My Media (through the link on your Navbar, or in your Course Tools drop-down menu, or in a draft Topic in the Content tool).

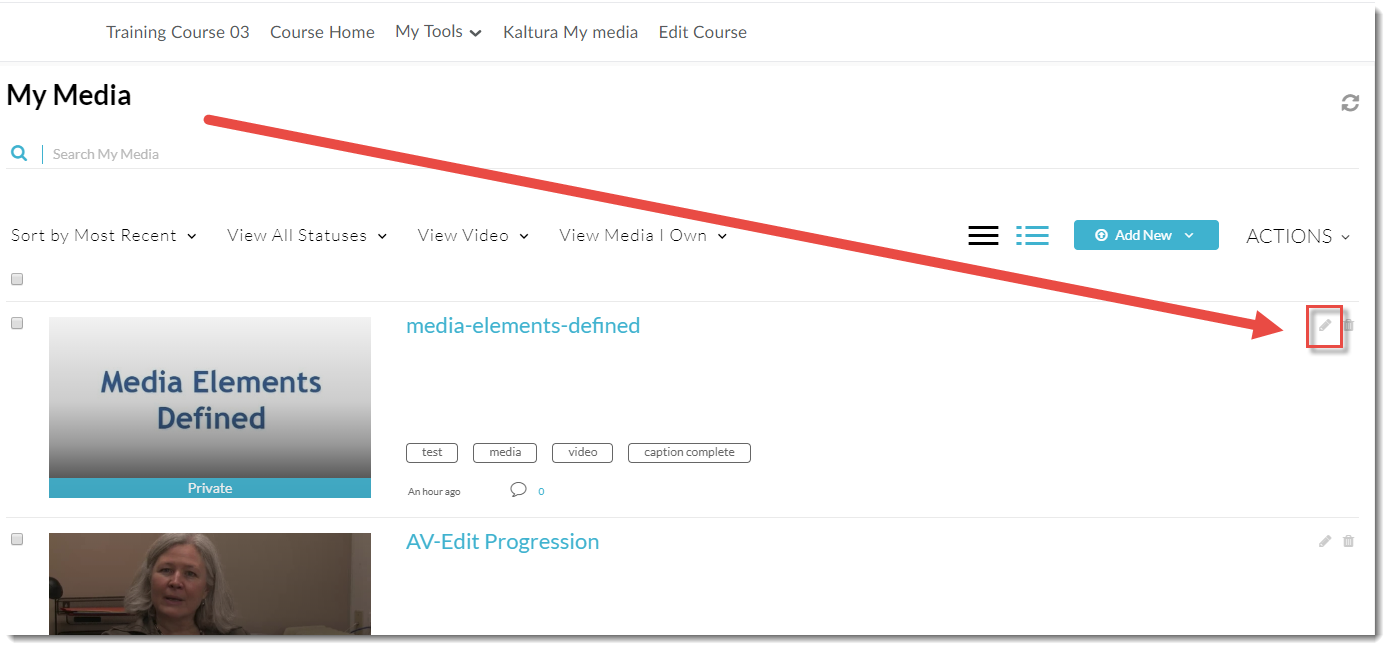
- Click the Edit icon (the pencil) to the right of the media piece you wish to edit. For the purposes of this tutorial, we will work with a video.
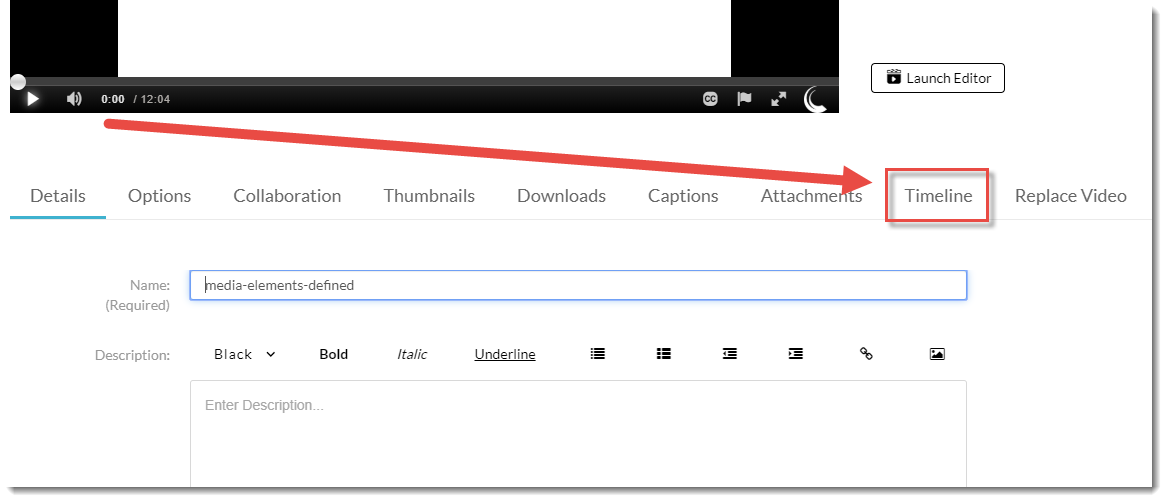
4. Click Timeline.
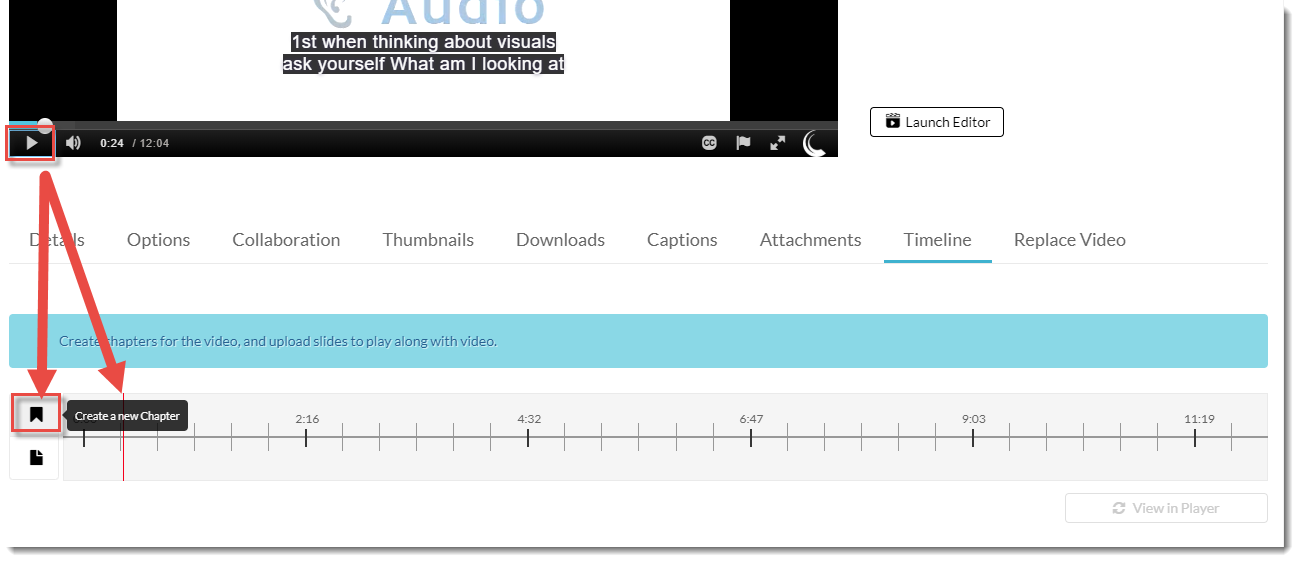
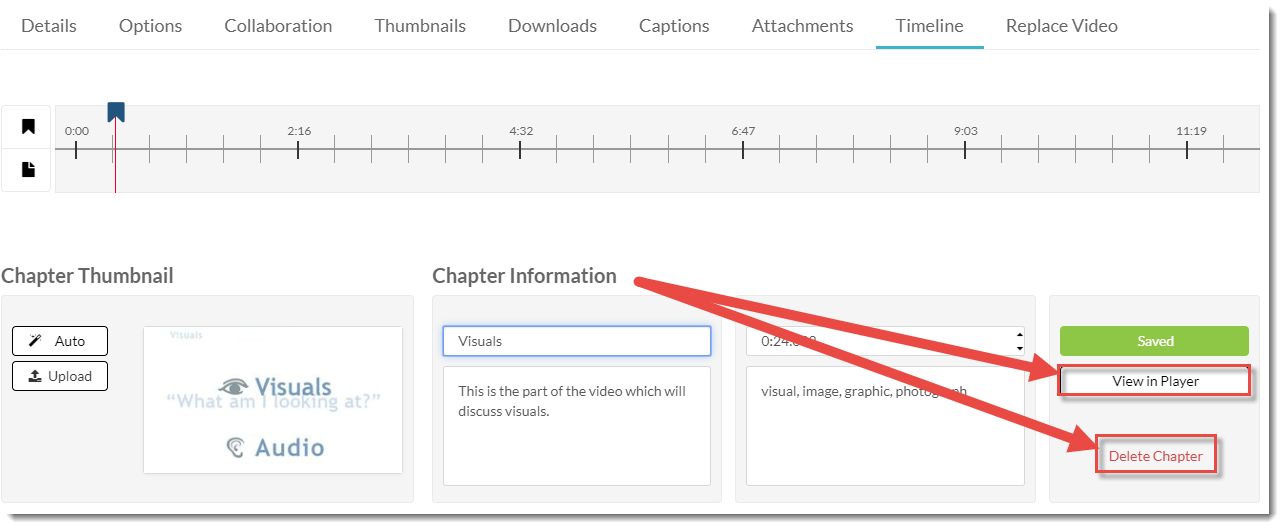
5. Play the video to the point you want to create a new Chapter, pause it, then click on the timeline at that point (there is a red vertical line which moves along the timeline as the video plays), and click the New Chapter icon (the one on the top, to the left of the timeline).
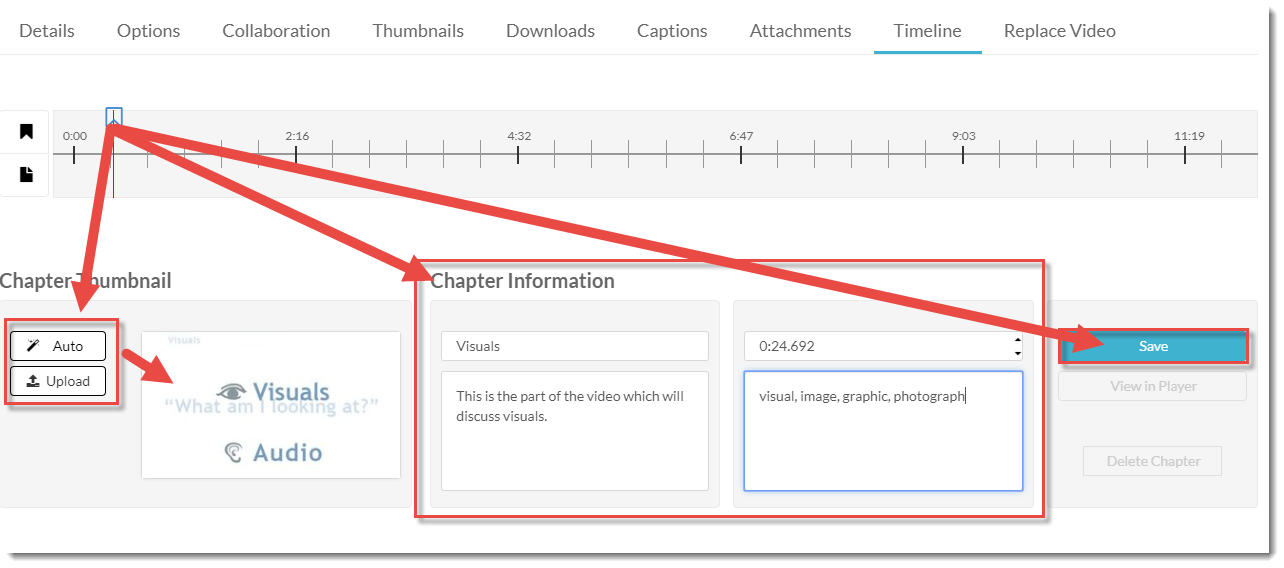
- The Chapter editing area will open. Here you can add a Chapter Thumbnail, either by clicking Auto (where Kaltura will set a thumbnail) or Upload (so you can add your own image). Add any Chapter information (Title, Description, Tags) you like – we recommend adding a Chapter Title at the very least. Then click Save.
7. After you have saved your Chapter, you can click View in Player to preview the Chapter, or click Delete Chapter to delete it.
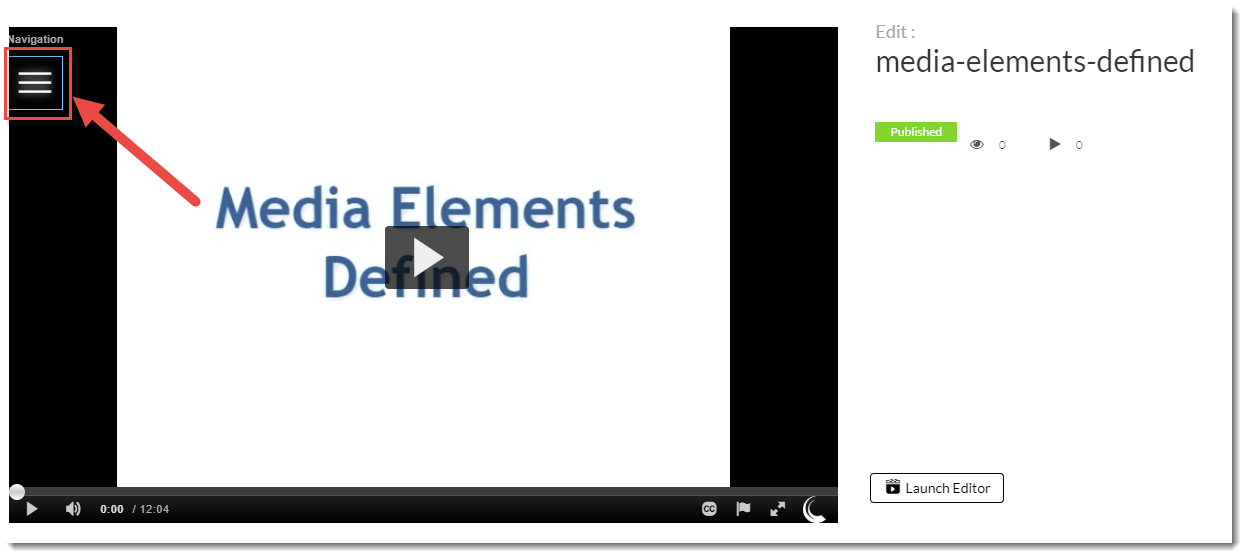
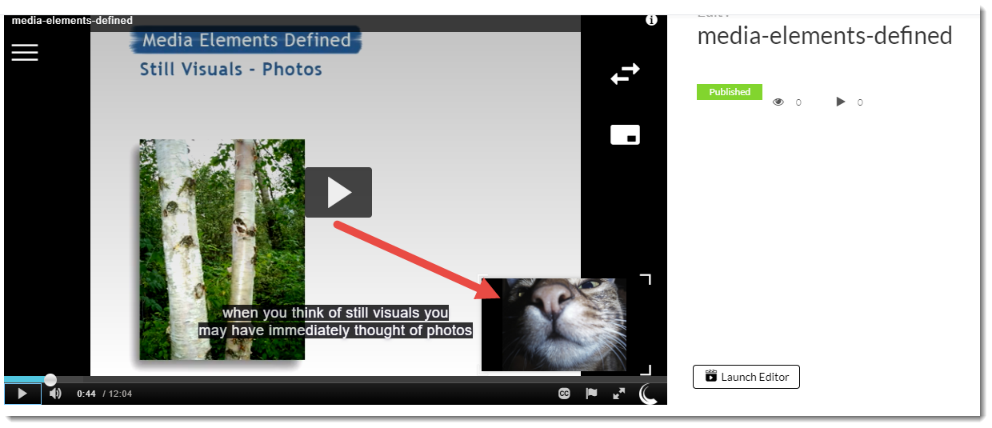
If you have clicked View in Player, scroll up to the video and click the hamburger icon at the top left to open the new Chapters panel.
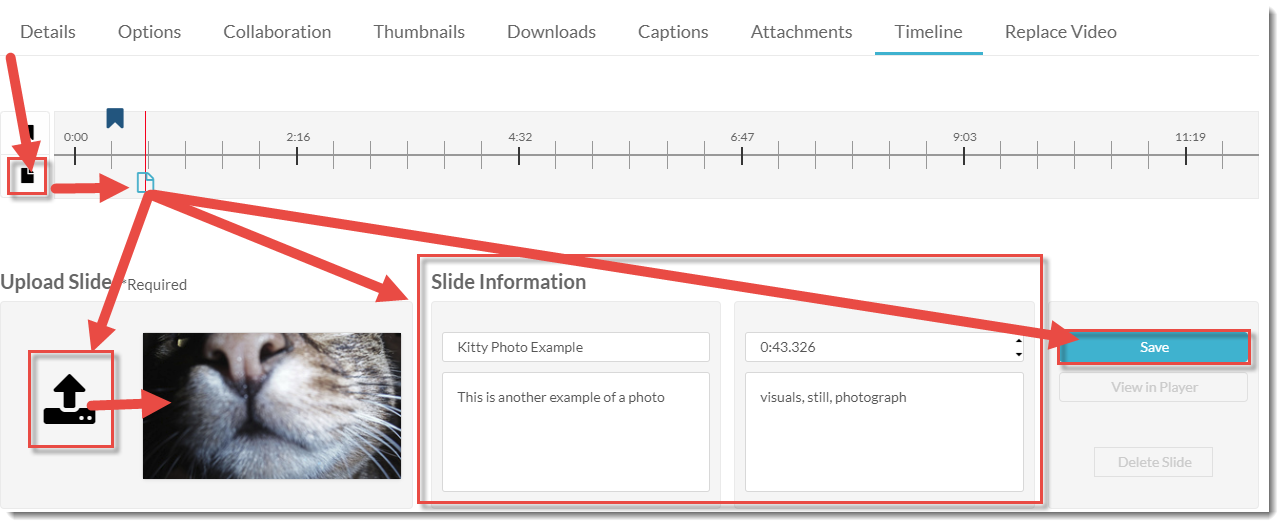
- To add a Slide to a video, play the video to the spot you want to add a slide, pause it, click on the timeline, and click the Create a New Slide icon (on the bottom, to the left of the timeline). The Slide Information editing area will open. Here you can click Upload a slide image (the icon on the far left) to upload an image from your device. You will then see your image in the small window next to the Upload Add Slide Information (Title, Description, Tags) you like – we recommend adding a Title at the very least. Then click Save.
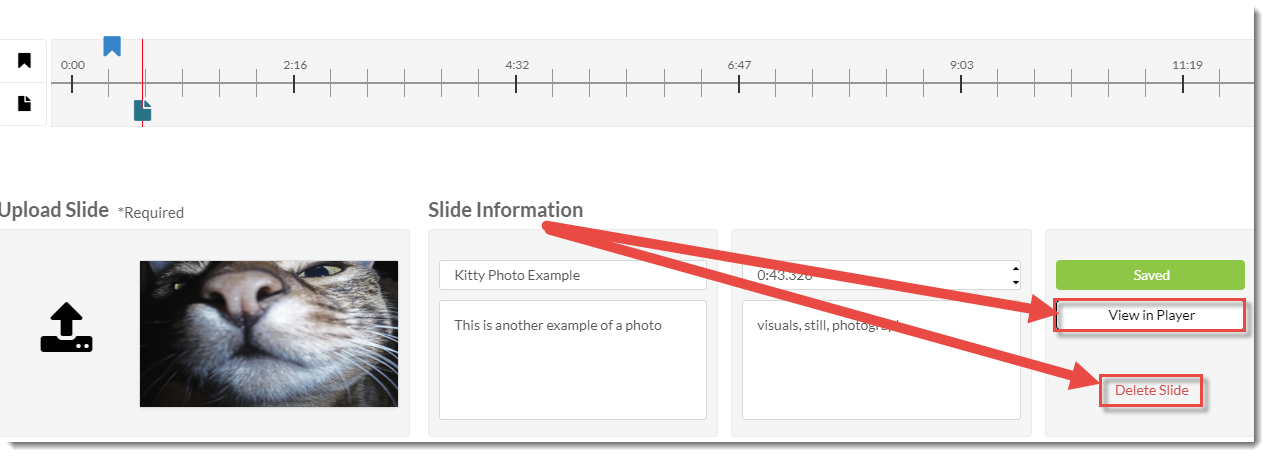
9. After you have saved your Slide, you can click View in Player to preview the Slide in the video (as we did for Chapters), or click Delete Slide to delete it.If you have clicked View in Player, scroll up to the video and play it to the location of the slide to see how it looks.
10. Continue adding Chapters and Slides until you are finished.
Things to Remember
Chapters and Slides are most useful in longer videos. Adding them to videos under 5 minutes may be confusing for students.
This content is adapted from eLearning Tutorials by Camosun and licensed under CC BY 4.0
