Automatic (machine based) captions in Kaltura
Kaltura REACH uses automated speech recognition (ASR) to provide machine-based captions for your video. Kaltura REACH captions are imperfect (70-90% accurate at best) and can improve over time as the program adapts to your voice. To revise and improve the accuracy of your video captions can be edited using the instructions below. Please contact ltsisupport@uvlc.ca for assistance or questions related to captioning.
Learn more about recommendations and options for captioning at UVic
How to manage captions
Edit captions
- Navigate to your video through Course Tools, Kaltura My Media.
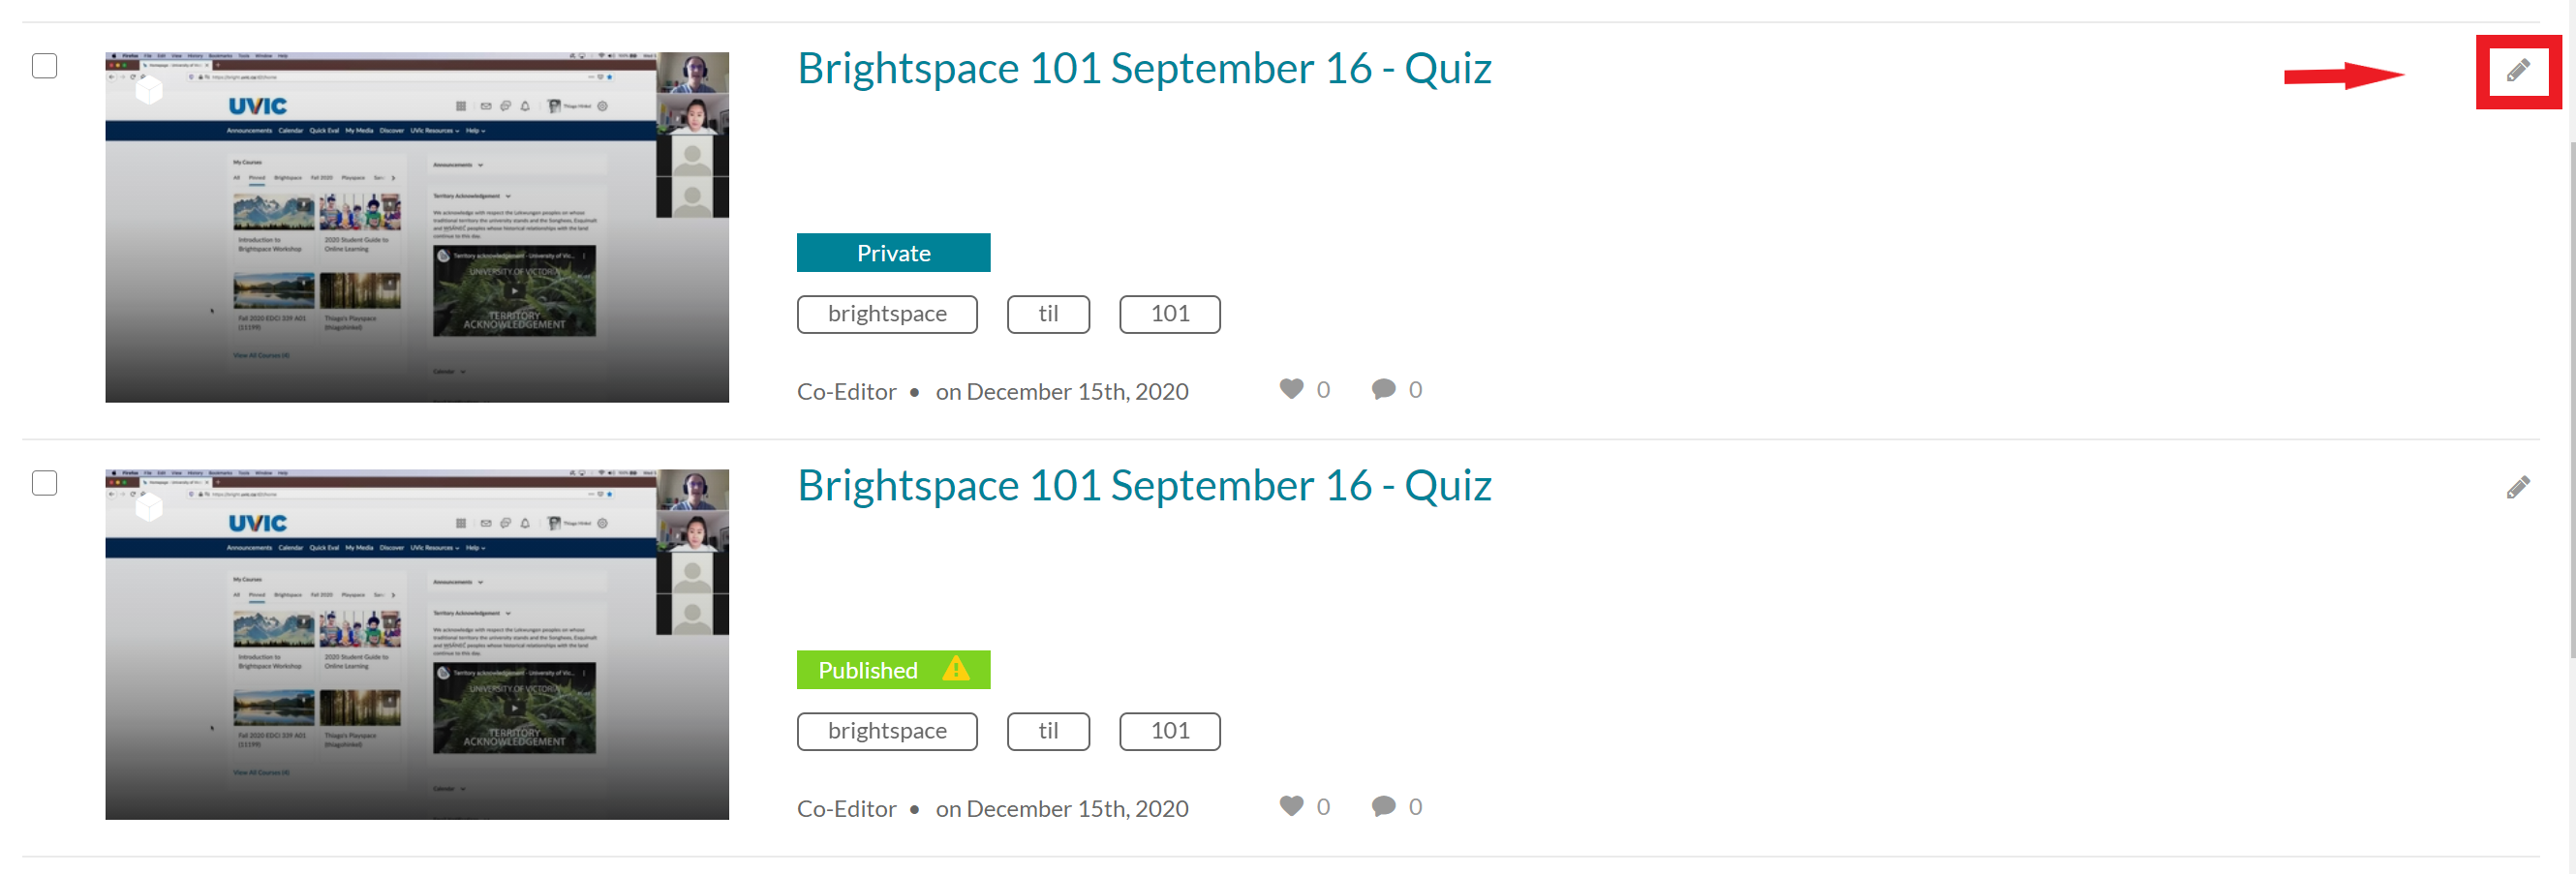
- Click on the pencil to the right of your video.
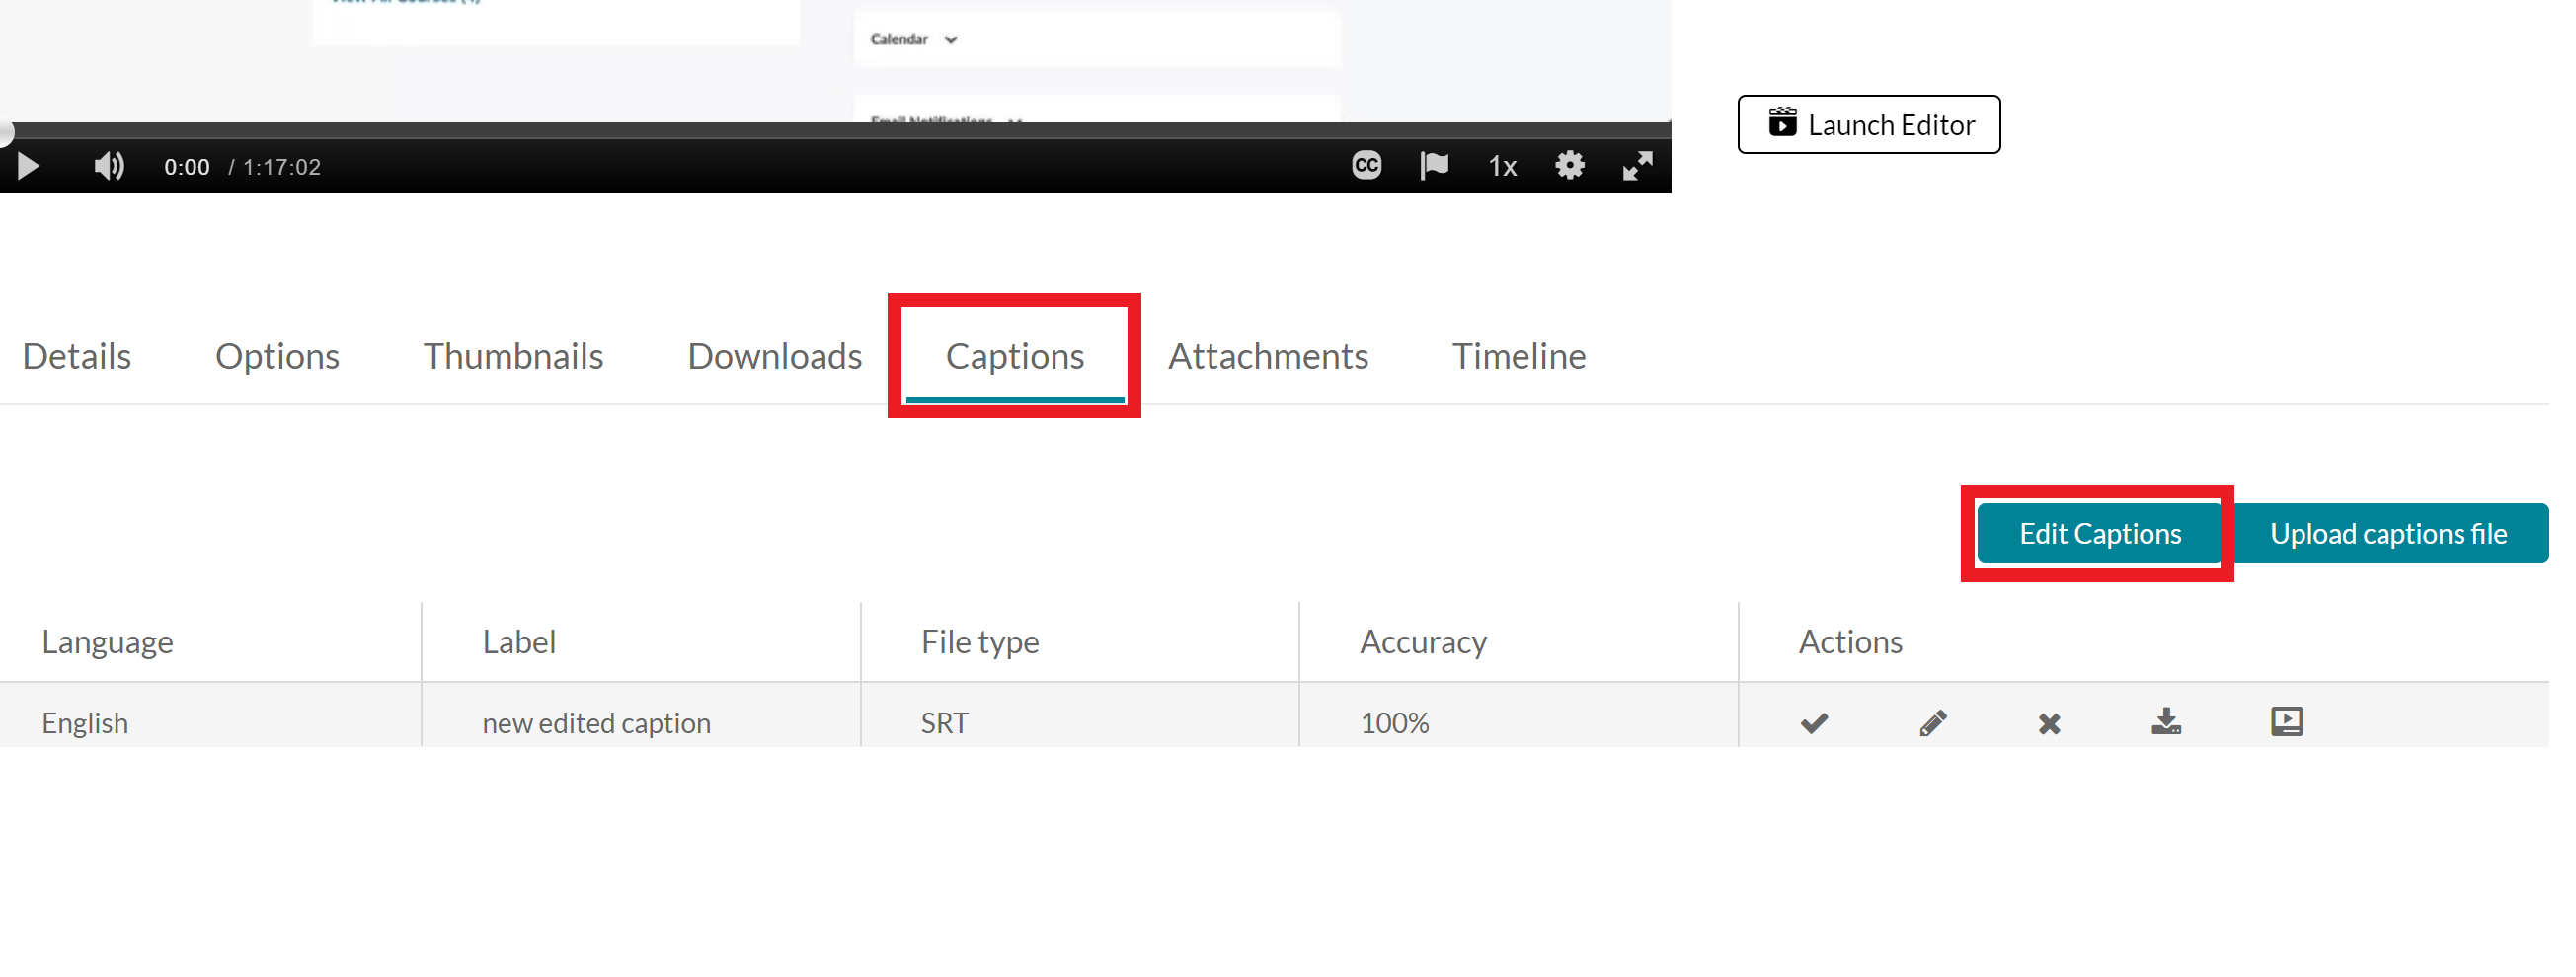
- Select the Captions tab, and then select the Edit Captions button.
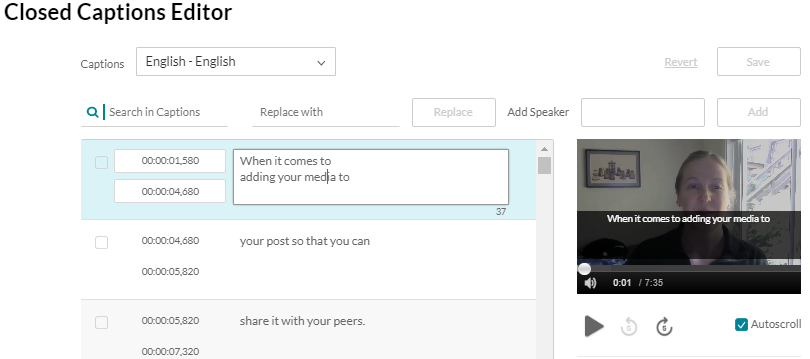
- In the Closed Captions Editor, you can edit caption text, watch your video play with captions, and fine-tune the timing for when your captions display.
- Click Save after you make your changes.
Turn off or delete captions
It’s recommended to turn off or delete captions only where absolutely necessary for your course. Many students request to see captions (even in their unedited form). In cases where removing captions is necessary, it’s recommended to turn them off as deleting them can be irreversible. Below you fill find step by step instructions for turning off or deleting captions.
- Navigate to your video through Course Tools, Kaltura My Media.
- Click on the pencil to the right of your video.

- Select the Captions tab.

- In the captions tab you can choose what to do with your captions:
- Selecting Don’t show on player will hide the captions.

- Selecting delete will remove the caption file from the video (Note that deleted captions cannot be recovered, and auto-generating new ones may not be possible).

- You can use the download feature to save a copy of a caption file (it is recommended to download caption files before deleting them from a video).

- There is also the option to select Set as default if you want to choose one set of captions as the default for a video.

- Selecting Don’t show on player will hide the captions.
Replace captions with a third party file
Learn more about options for captioning at UVic
Steps
- Go to your course in Brightspace.
- Go to Kaltura My Media (through the link on your Navbar, or in your Course Tools drop-down menu, or in a draft Topic in the Content tool).

- Click the title of the video you want to edit the auto CC for.
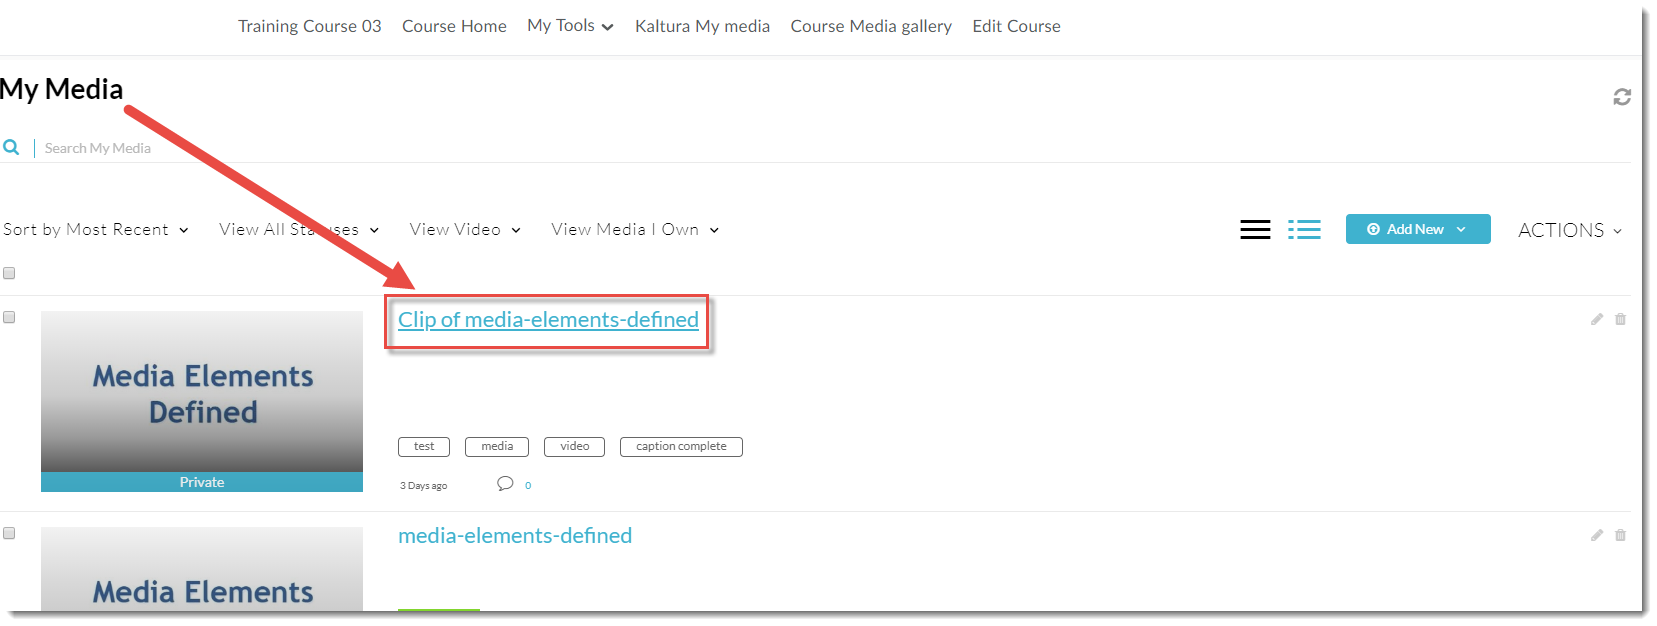
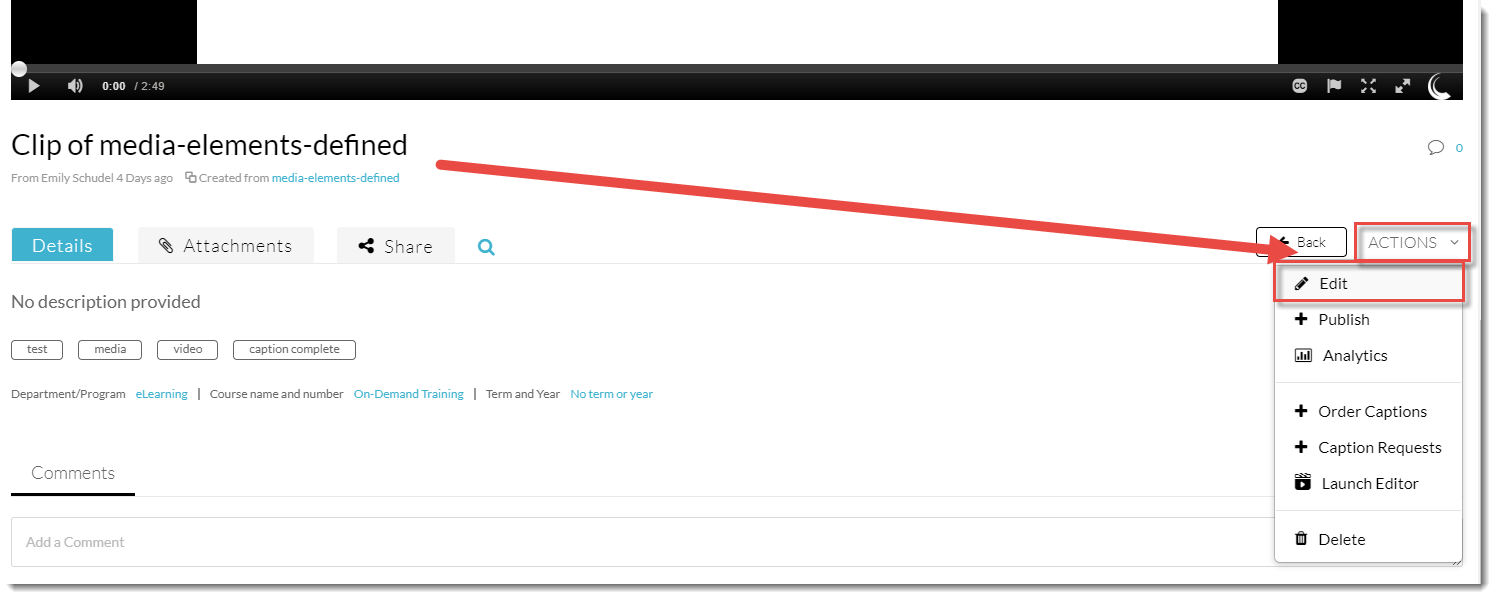
- Click the Actions drop-down and select Edit.
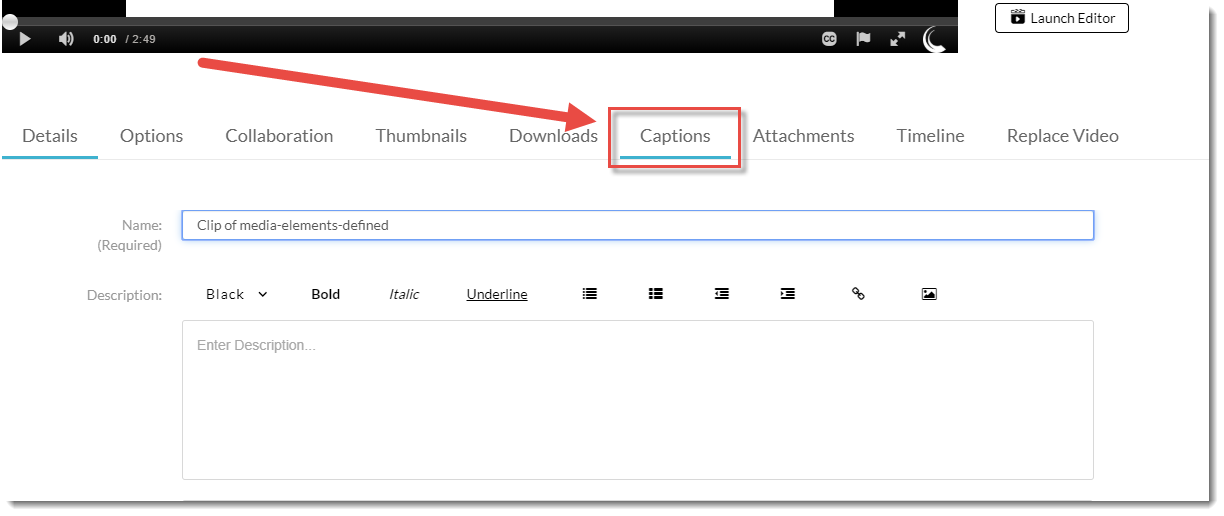
- Click on Captions.
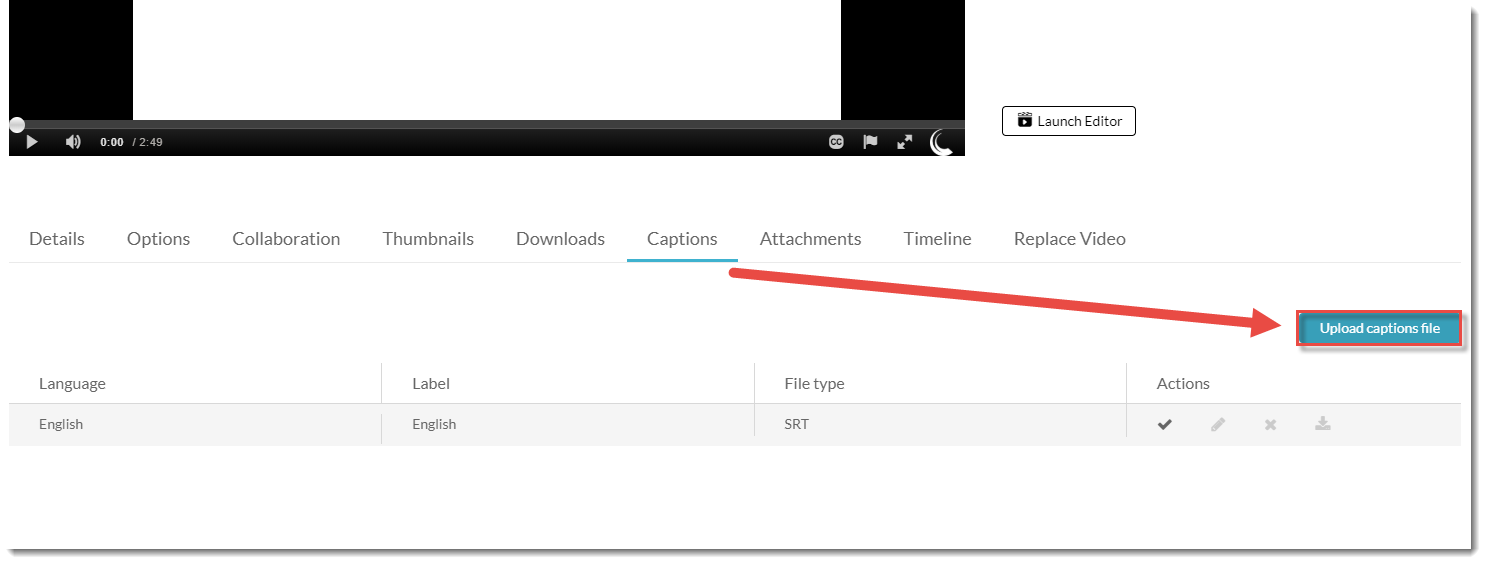
- Click Upload captions file.
- Browse for the captions file for this video on your device, select the Language of the captions file, give it a Label (this will appear in the Label column in the Captions table), and then click Save.
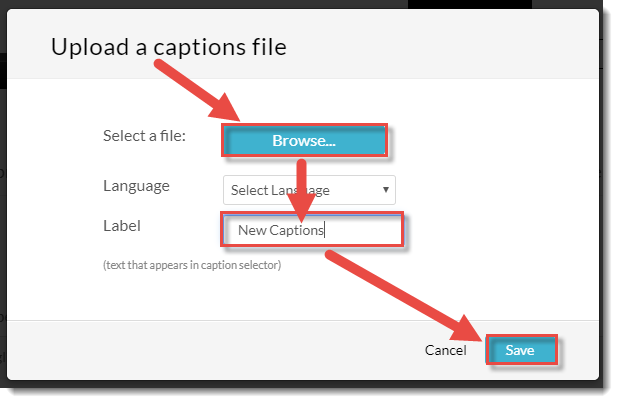
- Your new captions file will appear in the Captions table. Click on the X next to any auto CC files you want to delete. It will take up to 24 hours for the new captions to appear with your video.

- Check the status of your new captions by clicking going back to Kaltura My Media, clicking on the title of the video, and then clicking Actions and selecting Caption Requests. The status of your new captions will be listed in the table (for example, PENDING or COMPLETE).

This content is adapted from eLearning Tutorials by Camosun and licensed under CC BY 4.0
Assign another person to edit captions
Order captions for older videos
- Go to My Kaltura Media under Course Tools.
- Select the videos you want captioned by checking the boxes to the left-hand side of the videos you need captioned.
- On the right side of the screen click on the Actions drop-down menu and choose +Order Captions.
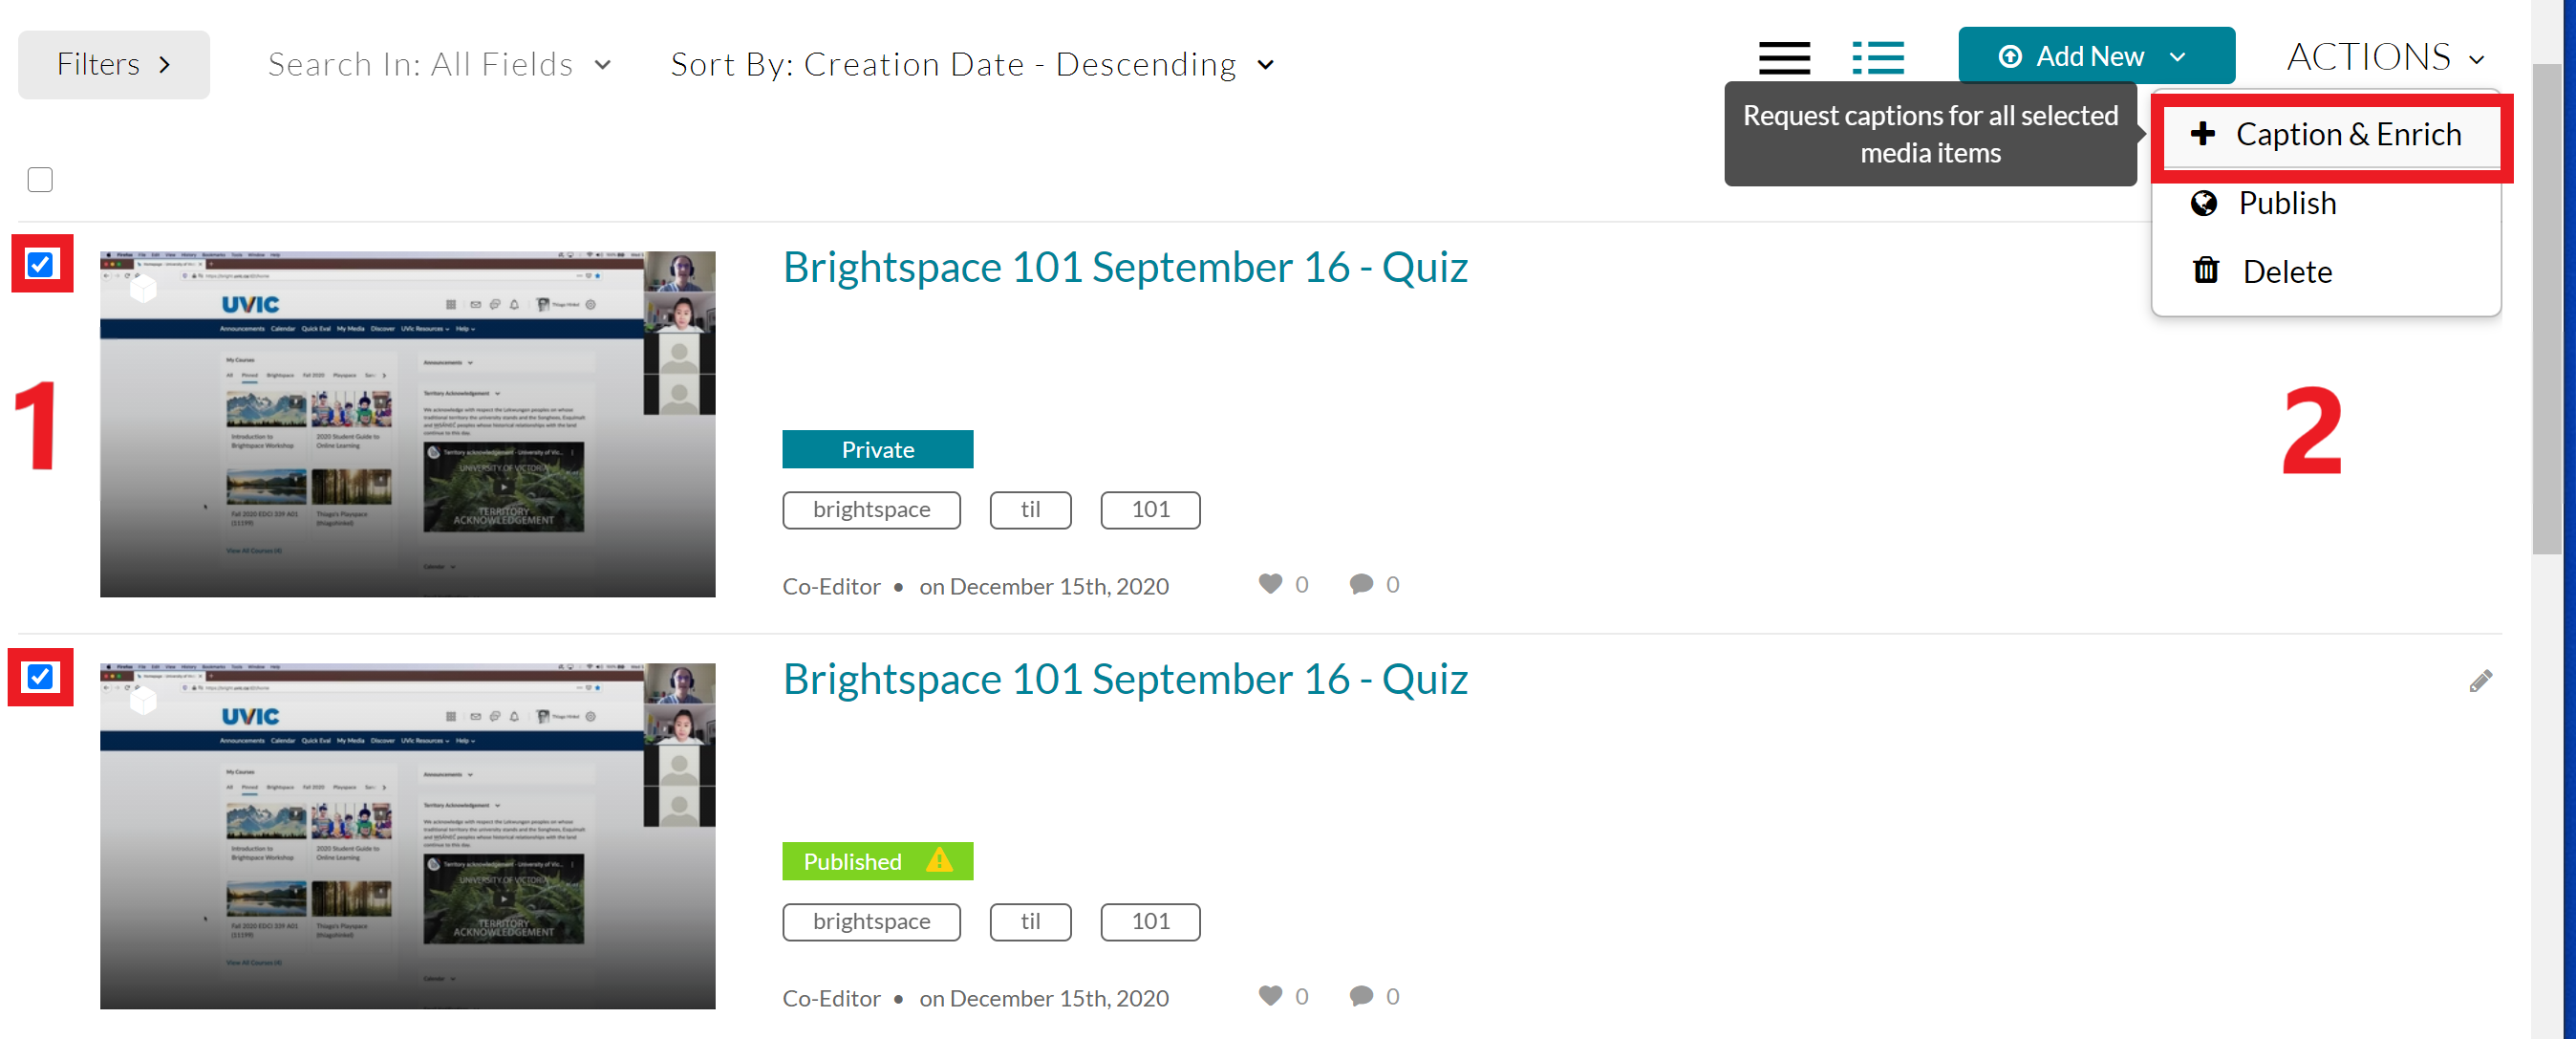
- Click Submit to order captions for all of the media you selected.
