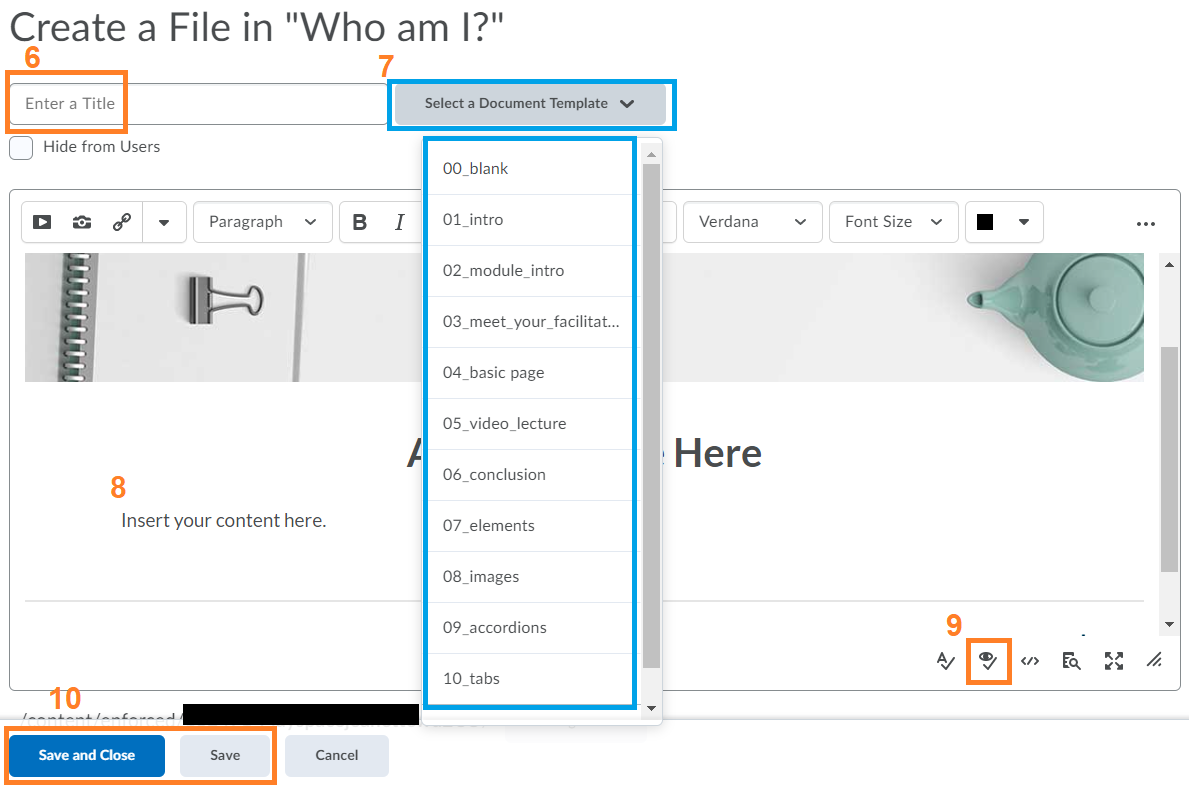
Document templates in Brightspace help you to quickly build engaging, responsive, beautiful, interactive, and accessible content. This post will explain what templates are available and how you can add them to your course.
What document templates are available?
There are lots of templates available to you. Some help you easily format content and others have pre-stocked content. Here is a brief list:
- Module Intro page – overview of module/unit including learning outcomes
- Meet Your Facilitator page – introduction to instructor, contact information, and office hours information
- Zoom Session page – details for live Zoom sessions
- Activity Quicklink page – information page and a link for a future activity (e.g. quiz or assignment)
- Basic page – simple layout for most types of information
Please visit this post for a complete list of available templates.
How to add a document template
When creating new content in your course, add a to bring a more consistent feel to your course content:
- From Content, select a unit or topic.
- Click Upload/Create (or Create New if using lessons)
- Click Add File (or HTML Document if using lessons)
- Click Browse for a Template.
- Select an existing template
- Click Add, and begin inserting your materials into the template.
Below you will find a three-minute video outlining the process of creating an HTML template and adding an interactive element.
Tips for working with templates
Selecting an HTML template after you have added content will overwrite your content.
To prevent unintended loss of content, create a new page and copy and paste existing content over or select an HTML template before adding content to your page.
If you are pasting from another source, remove all prior text formatting by using Ctrl+Shift+V (Cmd+Shift+V on Mac).
When adding content, periodically run the built-in accessibility checker to check for any additional accessibility issues that may have cropped up during the design process.
Click Save regularly at the bottom of the page


