You can give learners extra time, extra attempts, a longer grace period, or a different writing date / time on their quiz by using the Special Access feature. This feature is available for Quizzes and Assignments and is found in the Restrictions tab when creating or editing one of these activities. Special Access is set up on a quiz-by-quiz (or assignment-by-assignment) basis.
Please refer to the April 2021 Brightspace update (login required), for a summary of recent improvements to the Special Access feature.
Brightspace also has a course level (Classlist) quiz accommodation feature that can be used to add extra time for learners who have recurring exam accommodations; this feature adds extra time for every quiz that is created using the Quiz Tool.
The post below shows you how to set up special access for learners:
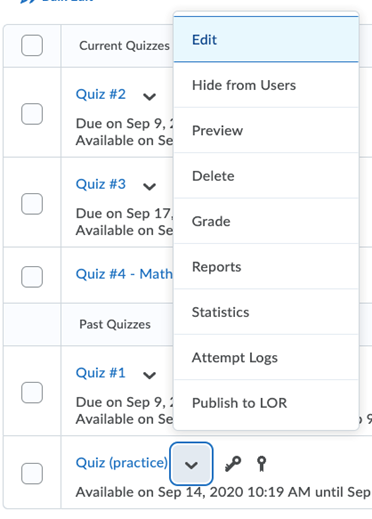
- Navigate to the Quiz Tool by selecting Course Tools in the blue navigation bar, then selecting Quizzes.
- Select Edit from the drop-down menu next to the title of the quiz you want to give the student special access to.
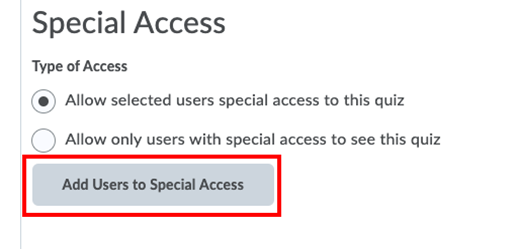
- Select the Restrictions Tab and then scroll to the bottom of the page to Special Access and review the Type of Access that your learner(s) will need. In most situations, leave Type of Access at the default setting of “Allow selected users special access to this quiz”. This setting allows the rest of the class to access the quiz using the quiz conditions shown on the Restrictions tab and you can provide additional custom access for a subset of learners.
Note: If you have created a copy of the original exam for a student, i.e., they will be writing a different version of the exam, please choose the second radio button option for Special Access to “Allow only users with special access to see this quiz”. The second radio button ensures that only students who need access to this new version of the exam can access it. - Select Add Users to Special Access to customize individual learner access settings.
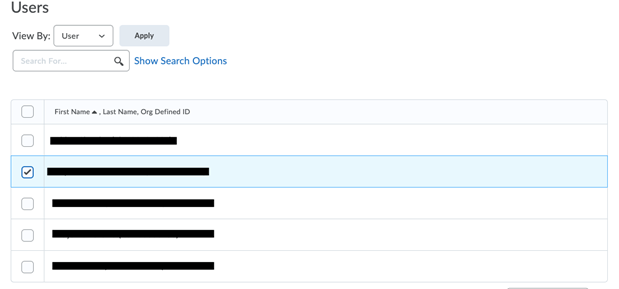
- Next, select the learner(s) for whom you want to set up special access and then modify quiz settings that you need to change.
IMPORTANT!! The default settings from the Restrictions tab will apply for any settings that you do not customize / change. We recommend only changing the settings that will differ from the original exam and leave other settings unchanged. In the example below we changed the Availability End Date to 11:00 AM.
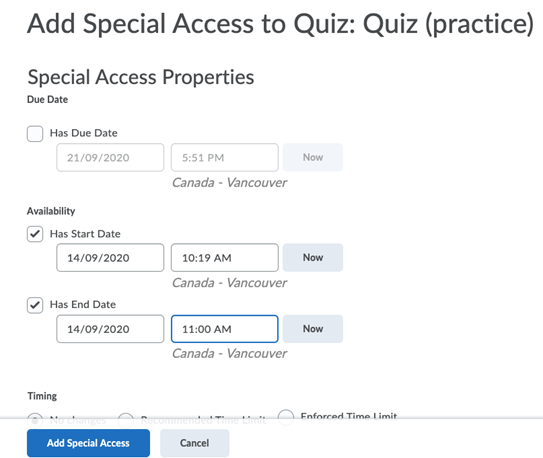
- Select Add Special Access at the bottom of the screen.
- Select Save and Close at bottom of the screen. Students should now be able to pick up where they left off given their new Accessibility End Date.
