The Assignments tool allows instructors to create a space in Brightspace where they can build, collect and eventually grade class assignments. Students can submit their work by uploading files or by using the text box. In addition to typing in text, learners can use the text box option to submit work that includes links or Echo360 videos. These assignments can be accessed, annotated and graded by the course instructor and teaching assistants (TAs) within Brightspace. The tool supports both individual and group assignments.
This article presents the steps involved in creating assignments for your course.
How to create a new assignment
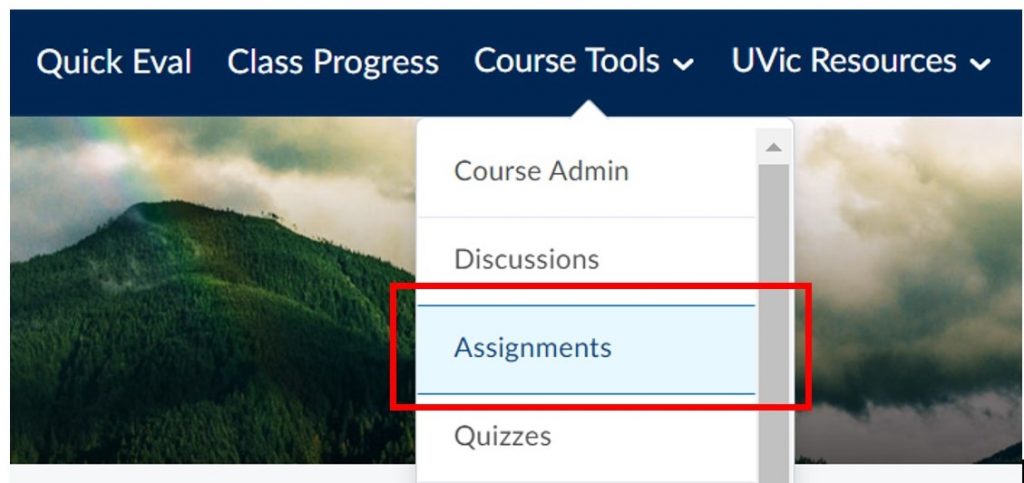
1. To create a new assignment, select Course Tools > Assignments from the navigation bar.
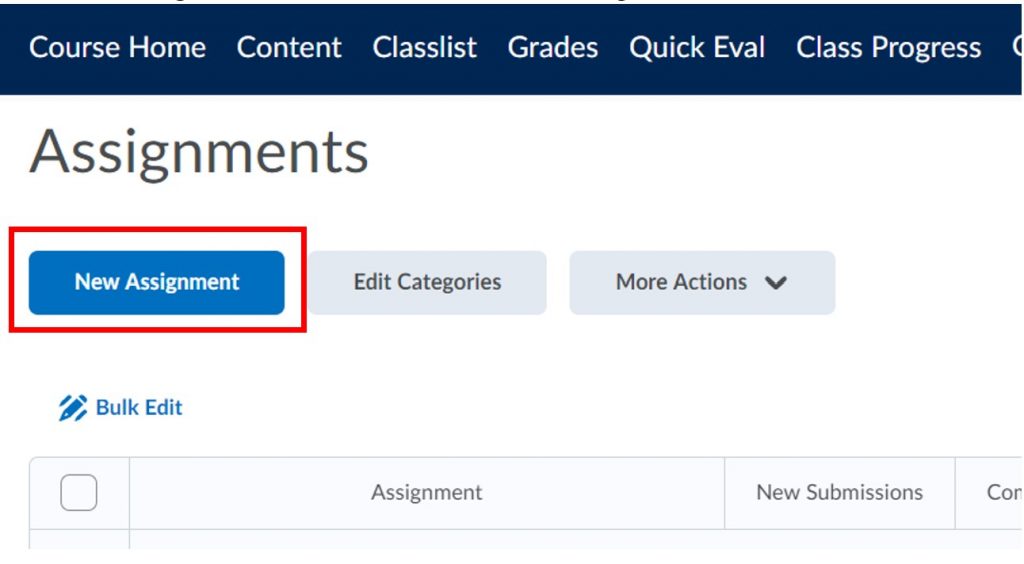
2. In the Assignments tool, click on New Assignment.
New Assignment Creation Experience
The new Assignment Creation Experience provides a clean and simple interface with reduced scrolling, which is optimal for mobile devices. It consists of condensed input boxes and settings nested under drop-down menus, as shown in the picture below:
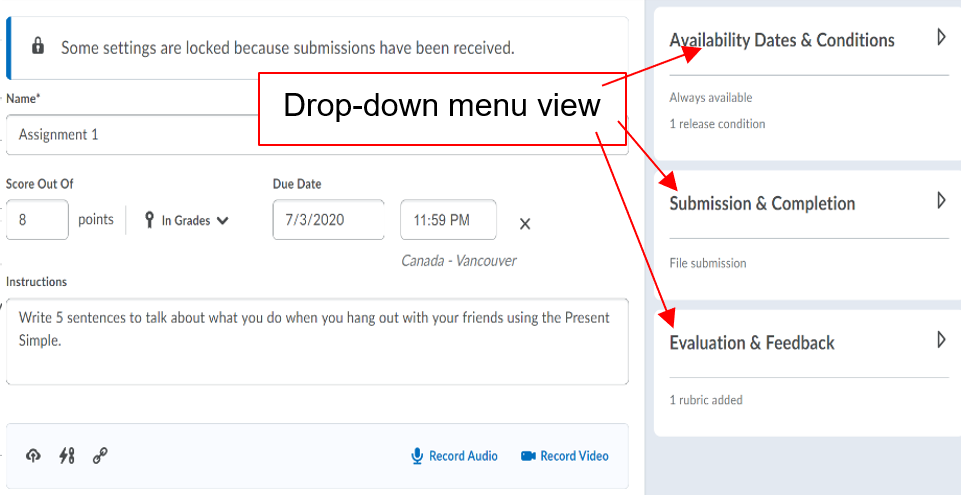
Assignment set-up
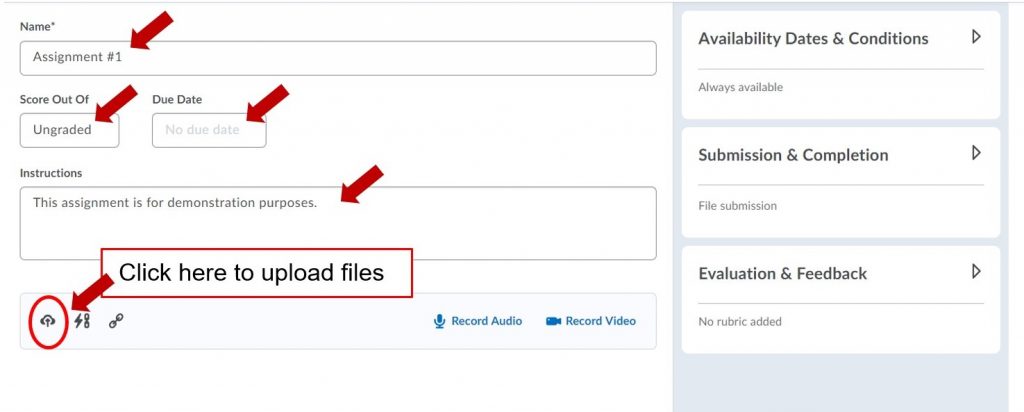
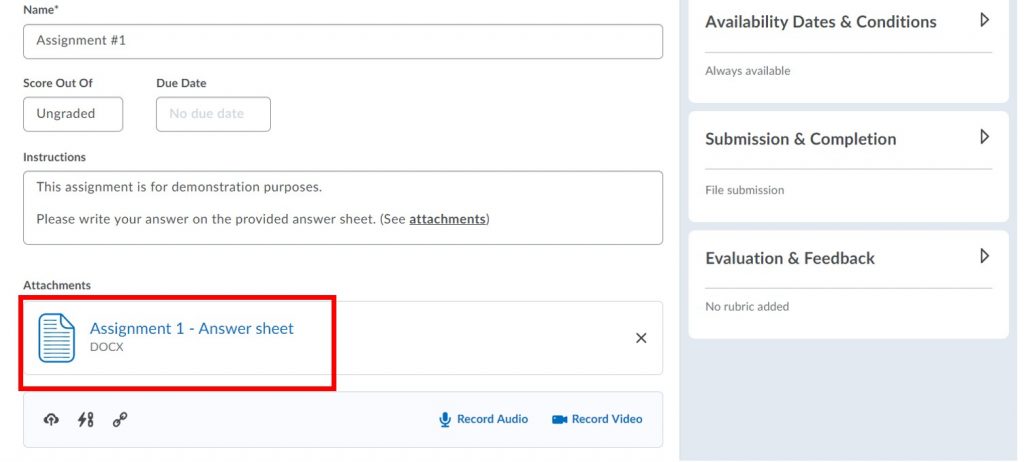
The first step is to enter the name of your assignment (required), its score in points (if relevant), due date, instructions, and any files. Uploading files can be useful if you wish for your students, for example, to write their answers on a provided answer sheet. It also allows you to provide complex instructions (including images) or to make any other file related to your assignment available to learners.
Please note that if you input a value (score) in the Grade Out Of box, an extra setting will appear. It will let you link the assignment to a grade item in the gradebook. For more information about the gradebook, please visit How do I enter/edit grades using the Brightspace Gradebook?

The Due Date option allows you to set up a deadline for your assignment. Students can still submit their work past the due date, but Brightspace will highlight those submissions as overdue.
Uploading a File
1. Select My Computer from the pop-up window if adding the file from your device. The dialogue below will appear when clicking to upload a file. Drag and drop your file or click the Upload button to search for files on your device.
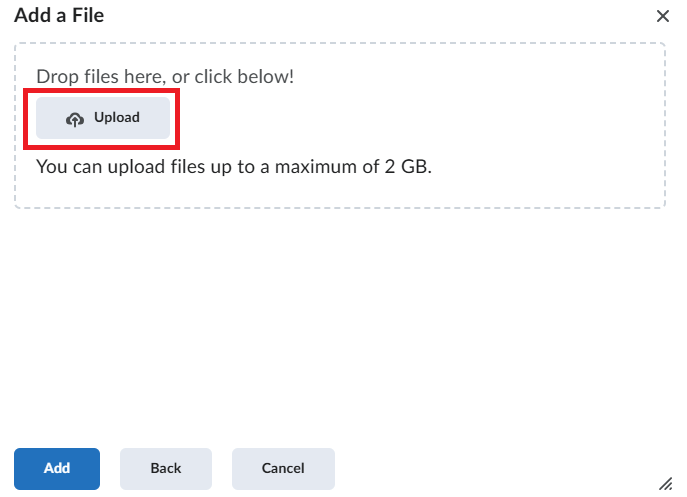
2. Once the file name has appeared after loading, click Add.

3. Check to make sure the file is shown under Attachments.
On the right, Availability Dates & Conditions lets you set the dates and the conditions for assignment availability, Submission & Completion lets you customize submission settings (e.g., individual/group submission), and Evaluation & Feedback lets you specify any feedback options (e.g., adding a rubric, annotation tools).
Availability Dates & Conditions
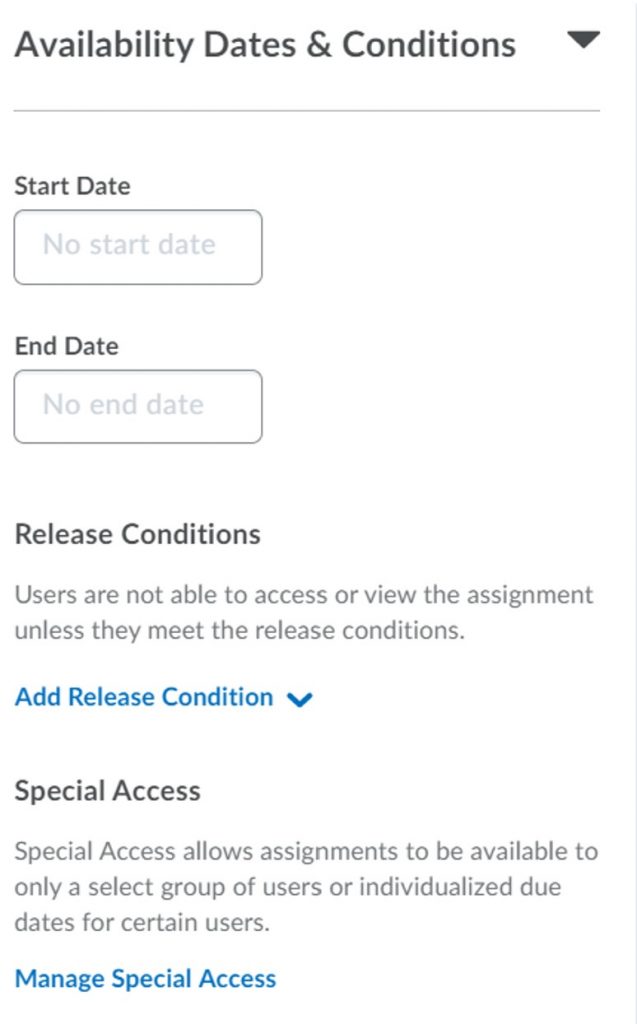
- Start Date: Specifies when your assignment will become available to students. Note that before this date, students can still see the assignment if you choose to unhide it, but they will not be able to make any submissions.
- End Date: Specifies when your assignment will end. After this date, the assignment will automatically lock and no further submission can be made. This is different than the Due Date mentioned previously (i.e., flagged by Brightspace as late but submissions are still accepted).
- Release Conditions: Specify the conditions the students have to satisfy in order to see and access the assignment; for example, if they need to visit specific content in the course page (specified by the instructor) or be in a particular group. For more information, please visit How to update release conditions and dates for a module or a topic within a module?
- Special Access: Used to grant users late/early access. This is useful when there is an accommodation you wish to make for learners or to extend a deadline for specific users.
Additional information for visibility of assignments with Start/End Dates (e.g., “Visible with access/submission restricted”) can be found here.
It is recommended that you take into consideration the time difference between the default time zone as shown on Brightspace to that of your students.
Submission & Completion

- Assignment Type: Allows you to set whether this will be an individual or group assignment. You will only be able to make it a group assignment if groups have been created previously.
- Submission Type: Manage whether students will be asked to either submit a file (and how many) and/or type in their response directly in the space provided in Brightspace, and how Brightspace will keep submissions. It also allows for submission on paper (or by email), and assignments observed in person (e.g., student presentations via Zoom).
- Allowable File Extensions: Specify what kinds of files you want learners to submit. Read more about allowable file extensions here.
- Notification Email: Brightspace will send an email to the people whose email addresses are included in this field, such as supplemental instructors and teaching assistants.
Evaluation & Feedback

- Rubrics: Create a new rubric or add an existing one. Visit How do I create/edit a rubric? for more details.
- Annotation Tools: Allows you to annotate students’ submissions and provide in-line feedback. This option is turned on by default.
- Anonymous Marking: Choose this option when you want to hide students’ identities when marking their work. Please note that once selected, you cannot undo this option.
- Evaluators: Manage your marking team workflow. View a video on how to assign evaluators and publishers in assignments here.
When you are done with choosing your settings, click Save and Close. This will complete your assignment creation process.
To access a quick video guide on how to create an assignment by using the new assignment experience, please visit this post on adding an assignment.
Need further support?
Please send us an email, visit live support, or book a consult with one of our LTI team. We are available to help!
