When it comes to grading assignments, Brightspace offers instructors different possibilities. This post will address the procedures used to mark assignments outside the platform. Please follow the steps below to download, mark, and upload student assignments.
- Go to Course Tools > Assignments and click on the assignment you wish to grade.
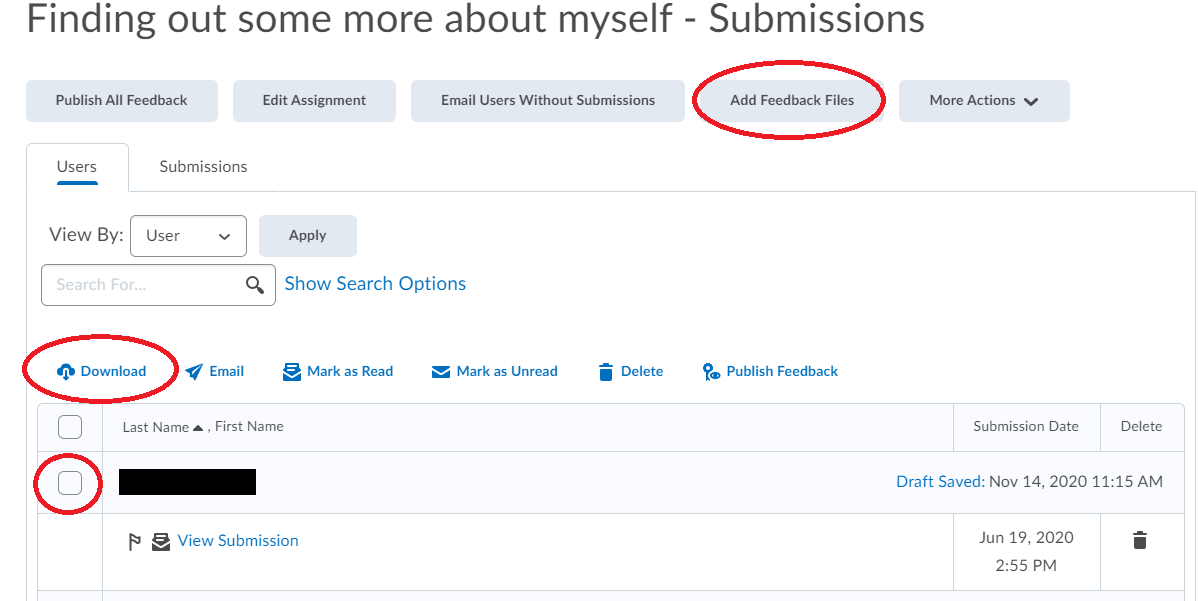
- Check the box beside the name of the students you want to give feedback to. You can alternatively check the box at the top of the list to select all students.
- Once the desired students are selected, select the download option as shown in the image below. This will download all the selected student assignment submissions in order, in the form of a zip file.
- Unzip the downloaded file. This will open into a folder with all the students’ submissions, each in their own respective folder.
- Assign feedback to each student for the assignment without changing the order.
- To Assign feedback for:
- PDFs: you can either add a textbox and give feedback in different colors or annotate to write freely. Once done, save the pdf.
- Word and Excel documents: type in your feedback (maybe with a different color) and save the file in the same folder.
- PNG or other image files: add a textbox to give feedback or annotate freely and save the file.
- Once all the feedback has been assigned for all the students in the respective folders, compress the top-level folder into a zip file.
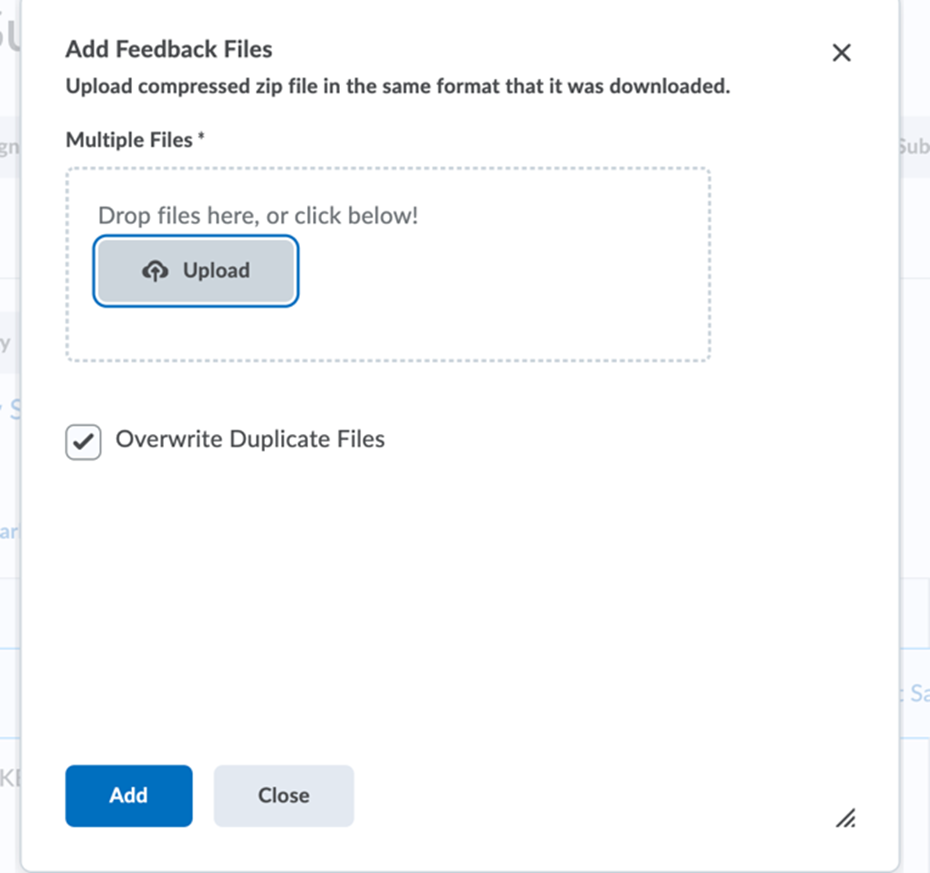
- Go to the respective assignment and select “Add Feedback Files”.

.
- Drag and drop the zipped folder containing the assignment feedback.

.
- Once uploaded, it will automatically assign the feedbacks to the respective student as per uploaded files. This enables you to release feedback to all students at once whenever you want.
- For Mac users, an extra item is created in the zipped folder(.DS store) which will cause a pop-up dialog box asking “Do you want to assign this to some student”. Click No and it will continue with the process as before.

